PinePhone
The PinePhone is a smartphone created by Pine64, capable of running mainline Linux and supported by many partner projects. The "BraveHeart" edition was the first publicly-available version of the phone, though it came without a fully functional OS (factory test image) and was geared specifically towards tinkerers and hackers. People looking for a stable consumer-grade phone should wait for the final release, which is expected to occur in March 2020 and will be available for at least five years.
"BraveHeart" PinePhone Unboxing and First Time Preparation Guide
From the factory the battery has a sticker on it that isolates the battery from the phone. The battery will not charge until this is removed.
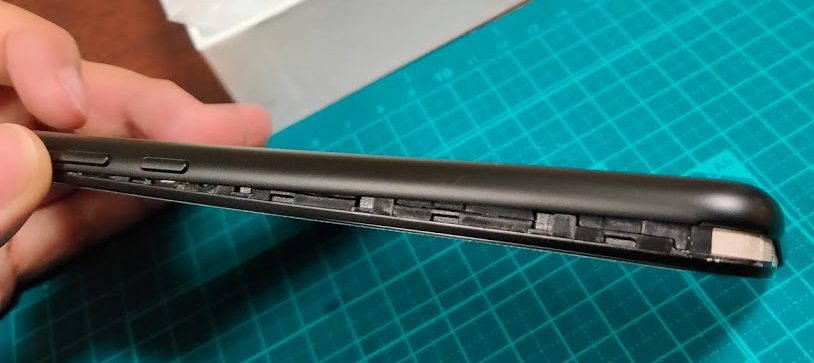
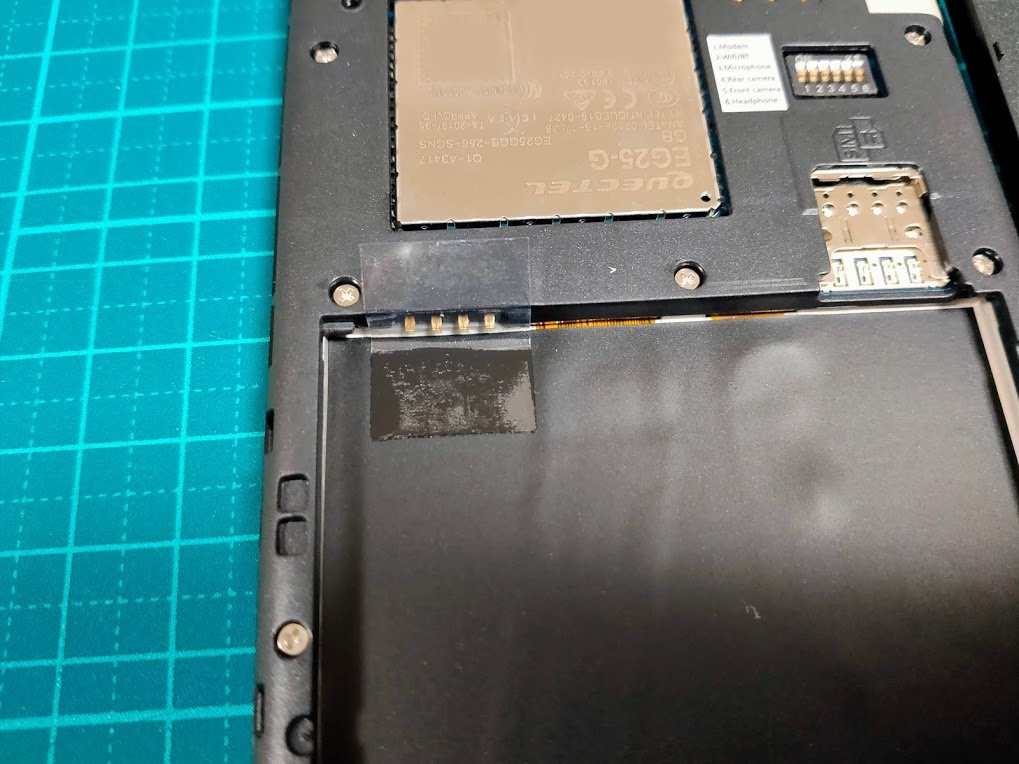
After unboxing remove the back panel. Then remove the battery and peel off the clear plastic sticker below it that isolates the charging contact. Then replace the battery. See #Battery for more info.
If you power on the phone the factory test image will boot. RTL8723CS (WiFi modem) will fail unless there is a WiFi network in range for it to see and the battery is charged. EG25 will fail until battery is charged.
By default there is no true OS image installed on Braveheart phones. An SD card with a bootable image needs to be inserted into the phone. See section 12 below for a list of OS options. Note the SD and sim sockets are stacked on each other The SD slot is the "shallower" socket and the SIM card goes in the "deeper" socket.
Some videos that illustrate the process:
Excellent first time guide video from Rob Braxman Tech
Flash an OS to microSD card video from Rob Braxman Tech
Specifications
Dimensions: 160.5 x 76.6 x 9.2mm
Weight: Between 180-200 grams
SIM Card: Micro-SIM
Display:
- Size: 5.95 inches (151mm) diagonal
- Type: HD IPS capacitive touchscreen, 16M colors
- Resolution: 1440x720, 18:9 ratio
System on Chip: Allwinner A64
RAM: 2GB LPDDR3 SDRAM
Internal Storage: 16GB eMMC, extendable up to 2TB via microSD, supports SDHC and SDXC
Back Camera: Single 5MP, 1/4", LED Flash
Selfie Camera: Single 2MP, f/2.8, 1/5"
Sound: Loudspeaker, 3.5mm jack & mic (jack doubles as hardware UART if killswitch 6 is deactivated)
Communication: EG25-G
- LTE: B1, B2, B3, B4, B5, B7, B8, B12, B13, B18, B19, B20, B25, B26, B28, B38, B39, B40, B41
- WCDMA: B1, B2, B4, B5, B6, B8, B19
- GSM: 850, 900, 1800, 1900 (MHz)
- WLAN: Wi-Fi 802.11 b/g/n, single-band, hotspot
- Bluetooth: 4.0, A2DP
- GNSS: GPS/GLONASS/BeiDou/Galileo/QZSS, with A-GPS
Sensors: Accelerometer, gyro, proximity, ambient light, compass
Killswitches: Modem, Wifi & Bluetooth, Microphone, Cameras
Battery: Lithium ion Rated Capacity 2800mAh (10.64Wh), Typical Capacity 3000mAh (11.40Wh) (nominally replaceable with any Samsung J7 form-factor battery)
I/O: USB Type-C (SlimPort), USB Host, DisplayPort Alternate Mode output, 15W 5V 3A Quick Charge, follows USB PD specification
PinePhone Board Information, Schematics and Certifications
- PinePhone Main Board Schematic:
- PinePhone USB-C Small Board Schematic:
- PINE A64 Certifications:
- Not yet available
Datasheets for Components and Peripherals
- Allwinner A64 SoC information:
- X-Powers AXP803 PMU (Power Management Unit) information:
- LPDDR3 (178 Balls) SDRAM:
- CMOS Camera module information:
- LCD Touch Screen Panel information:
- Lithium Battery information:
- Wifi/BT module information:
- LTE module information:
- Sensors:
- Digital Video to USB-C Bridge:
- Case information:
Developer works
Megous
Getting start with PinePhone Hardware
PinePhone Technical News and Update, also applies to other Allwinner devices including PINE A64 SBC
Hardware Revisions
- Project Anakin
- "Project Don't Be Evil" devkit
- PinePhone v1.0 - Developer batch
- PinePhone v1.1 - Braveheart
Hardware Addons
PinePhone Hardware Accessory Compatibility list
List of devices working with the PinePhone (depending on OS support)
USB-C Connector
The USB-C can be used to power the device, and offers USB2 host and OTG possibilities, and also can make use of the USB-C capability to integrate HDMI signals. Some USB-C hubs are available that offer power throughput, USB connection, HDMI port and Ethernet connection. The driver that would make this connection available is not supported at this time.
Pogo Pins
The PinePhone has 6 "pogo pins" on the back allowing for custom hardware extensions such as wireless charging or an IR blaster. The pogo pins provide access to an interrupt line, power input to charge the battery, 3.3v power source, and an I2C interface.
A step/stl/stp (3D model) file for the back cover is freely available for creating custom cases that interface with the pogo pins.
Serial console
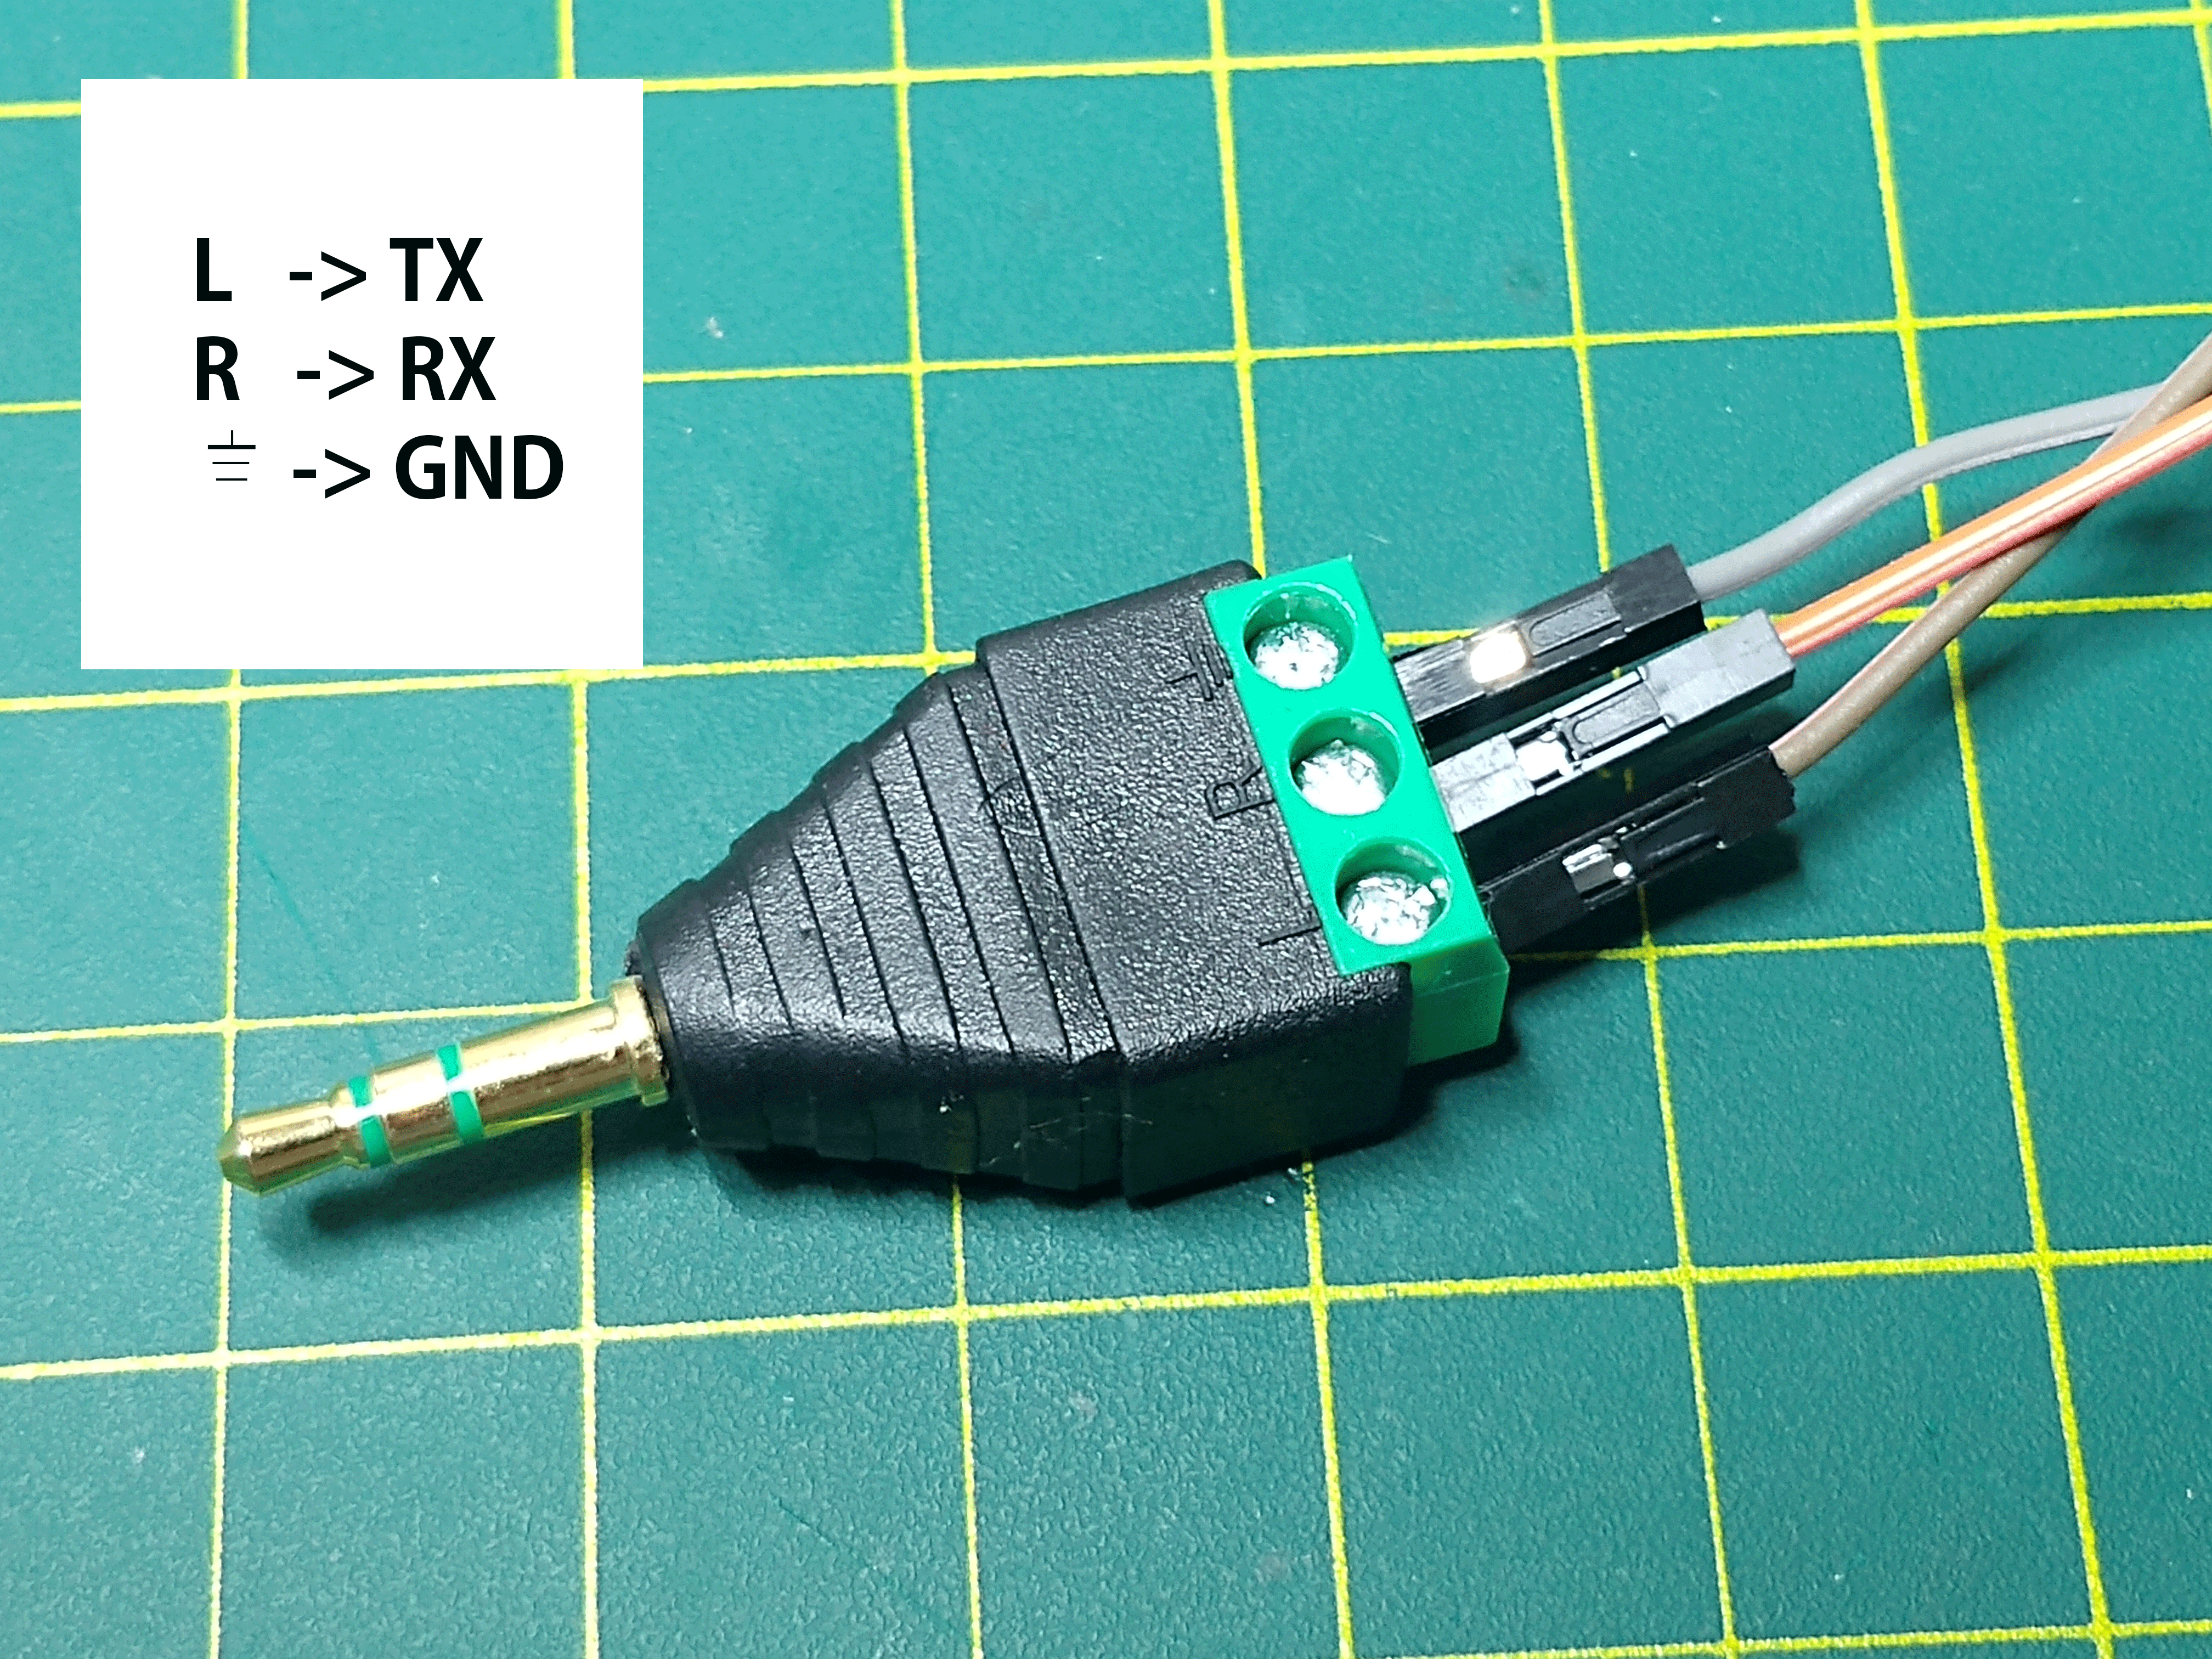
The PinePhone has a serial port in the headphone connector, it's activated by the 6th contact on the dipswitch. If the switch is on then the headphone connector is in audio mode, if it's off then it's in UART mode. This uart serial connection can also be used for communication with other devices from the PinePhone.
The uart is 115200n8
The pinout for the serial connector on the tablet side is:
- Tip: RX
- Ring: TX
- Sleeve: GND
The serial connection is 3.3V
You can also buy the debug cable from PINE64 Store The store cable uses a 4 ring plug, as seen in the PDF, but a 3 ring plug works just as well. That cable uses a CH340 chipset based serial to USB converter, but any 3.3v serial connection can be used.
Killswitch configuration
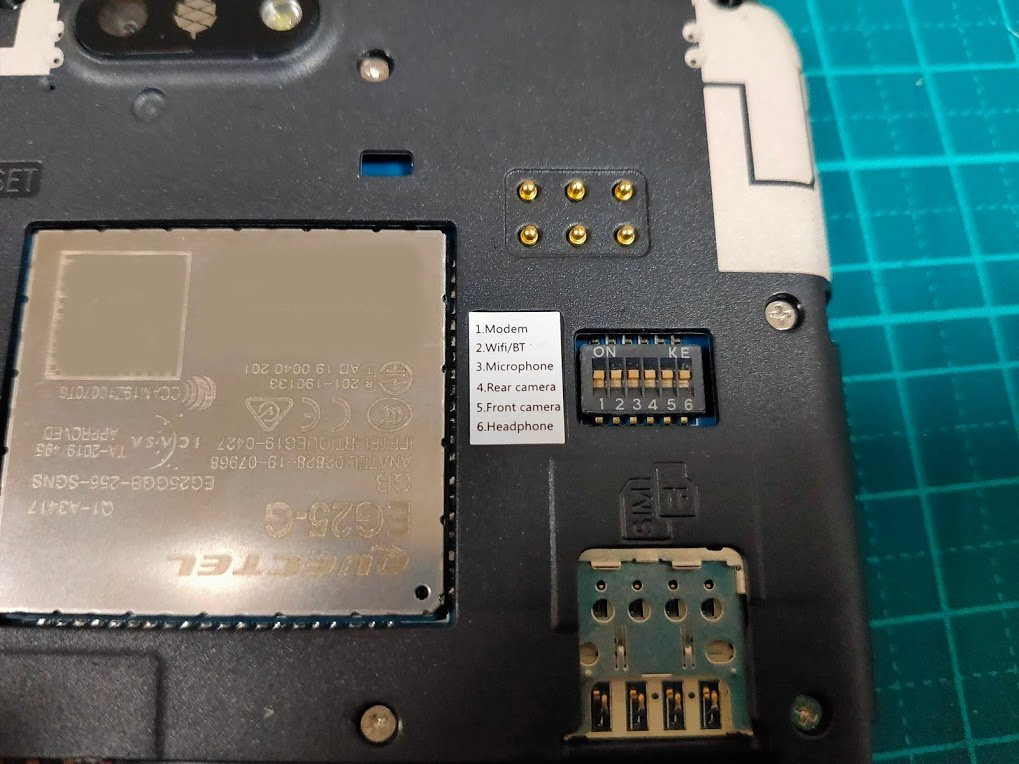
The PinePhone features six switches that can be used to configure its hardware. They are numbered 1-6, with switch 1 located nearest to the modem. Their on position is toward the top of the phone.
- Modem: On enables 2G/3G/4G communication and GNSS hardware, off disables.
- WiFi/BT: On enables Wi-Fi and Bluetooth communication hardware, off disables.
- Microphone: On enables audio input from on-board microphones (not 3.5mm jack), off disables.
- Rear camera: On enables the rear camera, off disables.
- Front camera: On enables the front camera, off disables.
- Headphone: On enables audio input and output via the 3.5mm audio jack, off switches the jack to hardware UART mode.
Battery
The supplied battery is meant to be compatible with Samsung part number EB-BJ700BBC / BBE / CBE from the 2015 J7 phone. There is a report that the EB-BJ700CBE isn't quite the same size, causing the back not to fit properly.
The battery terminals, in order from nearest the edge to nearest the middle, are:
- +ve
- thermistor
- -ve
- not connected
The battery includes a protection circuit that isolates it in a number of fault conditions, including if it is discharged too far. The fully discharged battery can be recharged by connecting the phone to a charger. Once it has charged sufficiently you will be able to boot the phone.
If your battery is hard to remove from the phone, try loosening the screws around it. Possibly cutting up a piece of plastic and sliding it under the battery as a pull tab can work too.
Your Brave Heart phone ships with a plastic sticker between the battery and the phone. You need to open the back cover (gently), then remove the battery and finally remove the sticker. This is to protect the device from turning on during shipping.
There has been a report on the forum that this sticker can bend the pins that make connection between the battery and the phone: please check your setup carefully after removing the sticker.
Note: the EG25 modem and RTL8723CS wifi/bluetooth do not work without battery power, even if you are supplying enough power to the Pinephone with USB-C.
Modem and Carrier Support
There is a document about using the modem by user megi here. This is from circa 18 Jan 2020.
Note at this date there is no TL;DR version - the script at the end to disable the modem before power off is pretty essential to avoid corrupting your modem's flash memory.
To check if the PinePhone is supported on your carrier:
Search for your carrier on frequencycheck.com and compare the carrier's LTE/GSM/WCDMA frequencies to the PinePhone's supported frequencies (listed under the specifications section).
It is likely that there will be a few frequencies that your carrier uses which are not supported by the PinePhone. Not all of the carrier's frequencies need to be supported by the PinePhone for it to work - as long as most of them are supported, you will still get good coverage.
Factory Test Requirements
Most of the self tests should just work, but a couple of them will fail unless certain requirements are met.
RTL8723CS - WiFi
- The self test needs a visible access point nearby so it can discover an SSID.
- The self test may fail if the battery charge is too low.
EG25 - Modem
- A working micro-SIM that doesn't require a PIN to unlock
- Enough battery charge
Operating Systems
The PinePhone will automatically boot from microSD if a bootable card is inserted. Although it is technically possible to use any ARM distro (because the PinePhone uses the mainline kernel), there are a few that are designed specifically for
The 'PinePhone Software Releases' page has a complete list of currently supported Operating System images that work with the PinePhone as well as other related software information.
The list includes OS images and descriptions of:
File:Ryodebianphosh.png Debian + Phosh
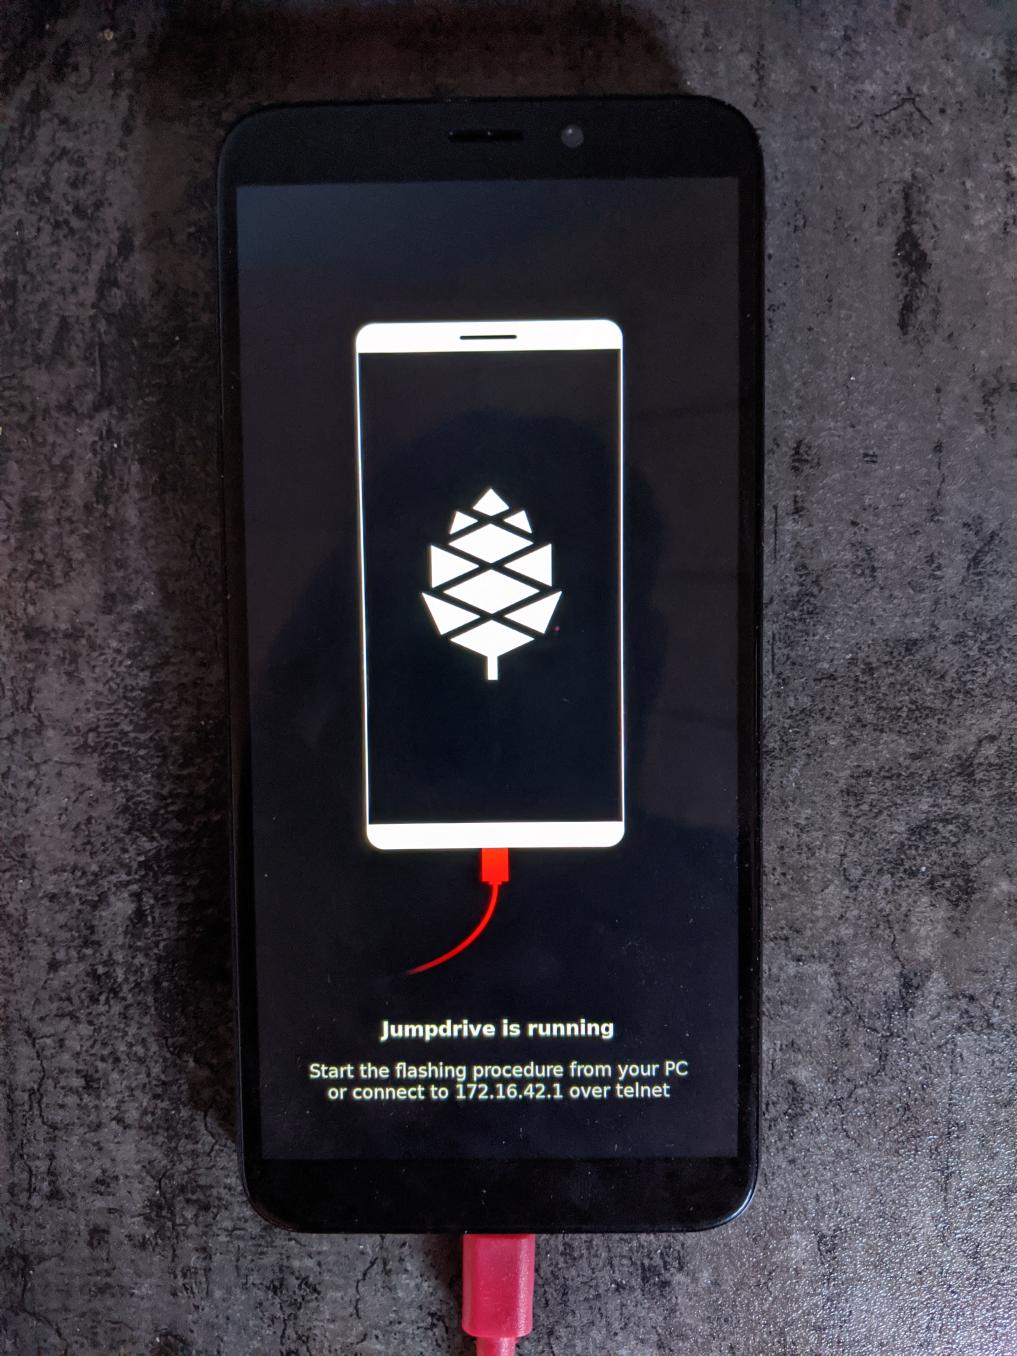
Flashing eMMC using Jumpdrive
The internal eMMC flash storage can be flashed using the Jumpdrive utility by Danct12 and Martijn from postmarketOS. This utility boots from micro SD and exposes the internal eMMC flash storage when the PinePhone is connected to a computer. The process of flashing and OS to the exposed and mounted eMMC is identical to that of any other storage medium - e.g. a SD card. You can use the 'DD' command or a utility such as Etcher or Gnome Disks, etc.
Latest Jumpdrive can be found here.
Detailed Usage Instructions
- Download the Jumpdrive image
- Flash the Jumpdrive image to a micro SD card
- Boot the PinePhone from the Jumpdrive micro SD card
- Connect the PinePhone to your computer using USB-A -> USB-C cable
- Flash the exposed (mounted) PinePhone drive with a chosen OS image
- Once the flashing process is complete, disconnect the PinePhone from your PC, power it down and remove the Jumpdrive SD card
- The process is now finished, and you can boot from eMMC
Jumpdrive also acts as a rescue image in case if you messed up your installation. To do so, you can telnet to 172.16.42.1, mount rootfs and fix it!
