Recovering the Bootloader for STAR64 JH7710 over serial using screen
Jump to navigation
Jump to search
This page or section is under construction
Please help to review and edit this page or section. Information are subject to change.
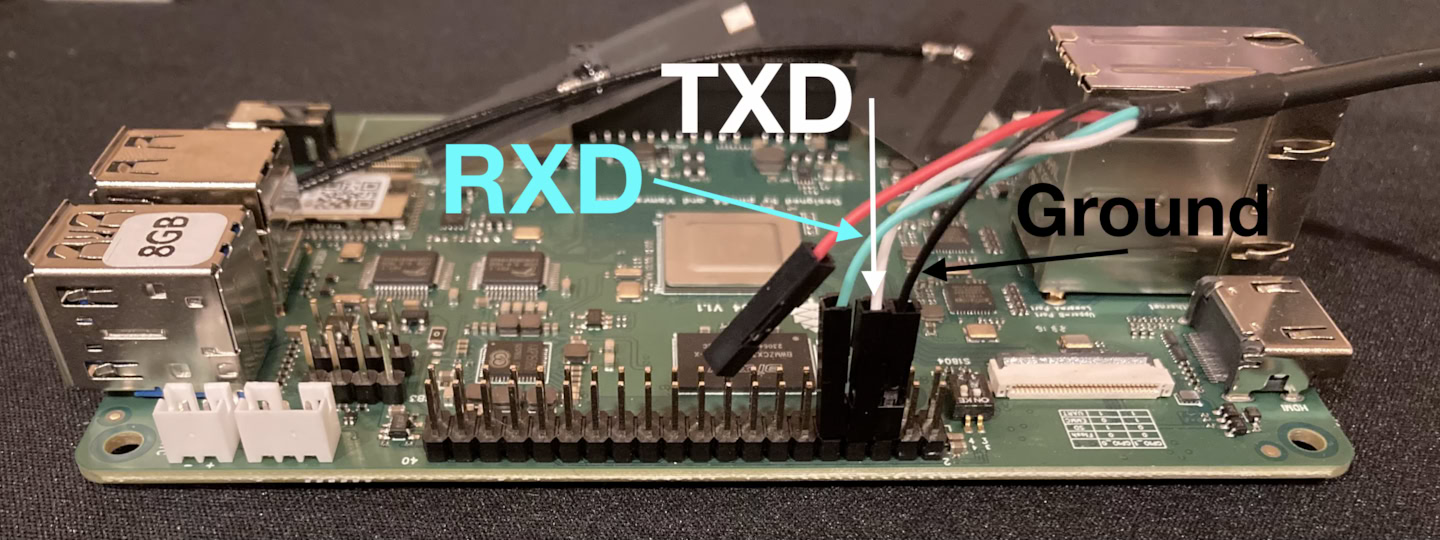
STAR64 serial wiring
Connect a USB to serial converter cable with 3.3 V TTL levels to your STAR64 to the pins 4 (GND), 6 (TXD) and 8 (RXD).
Avoid the pins below pin 6; those are 5 V which is enough to mess up most serial cables.
Recovering the Bootloader for STAR64 JH7710 over serial using screen
cd <path-to-directory-with-Tools>
screen -m -S star64 /dev/ttyUSB0 115200
# open a second shell
screen -S star64 -X exec \!\! sx Tools/recovery/jh7110-recovery-20230322.bin
# type 0 in the first shell
screen -S star64 -X exec \!\! sx u-boot/spl/u-boot-spl.bin.normal.out # file created with: ../Tools/spl_tool/spl_tool -c -f spl/u-boot-spl.bin
# type 2 in the first shell
screen -S star64 -X exec \!\! sx u-boot/u-boot.itb # file created with: tools/mkimage -f ../Tools/uboot_its/visionfive2-uboot-fit-image.its -A riscv -O u-boot -T firmware u-boot.itb
Backup current SPI
Using Linux
Execute the commands on the star64 (takes some time):
dd if=/dev/mtd0 of=/tmp/star64-factory-spl.bin
dd if=/dev/mtd1 of=/tmp/star64-factory-uboot.bin
dd if=/dev/mtd2 of=/tmp/star64-factory-data.bin
Execute on you host:
rsync ${MNAME}:'/tmp/star64-factory-*' .