PinePhone Pro
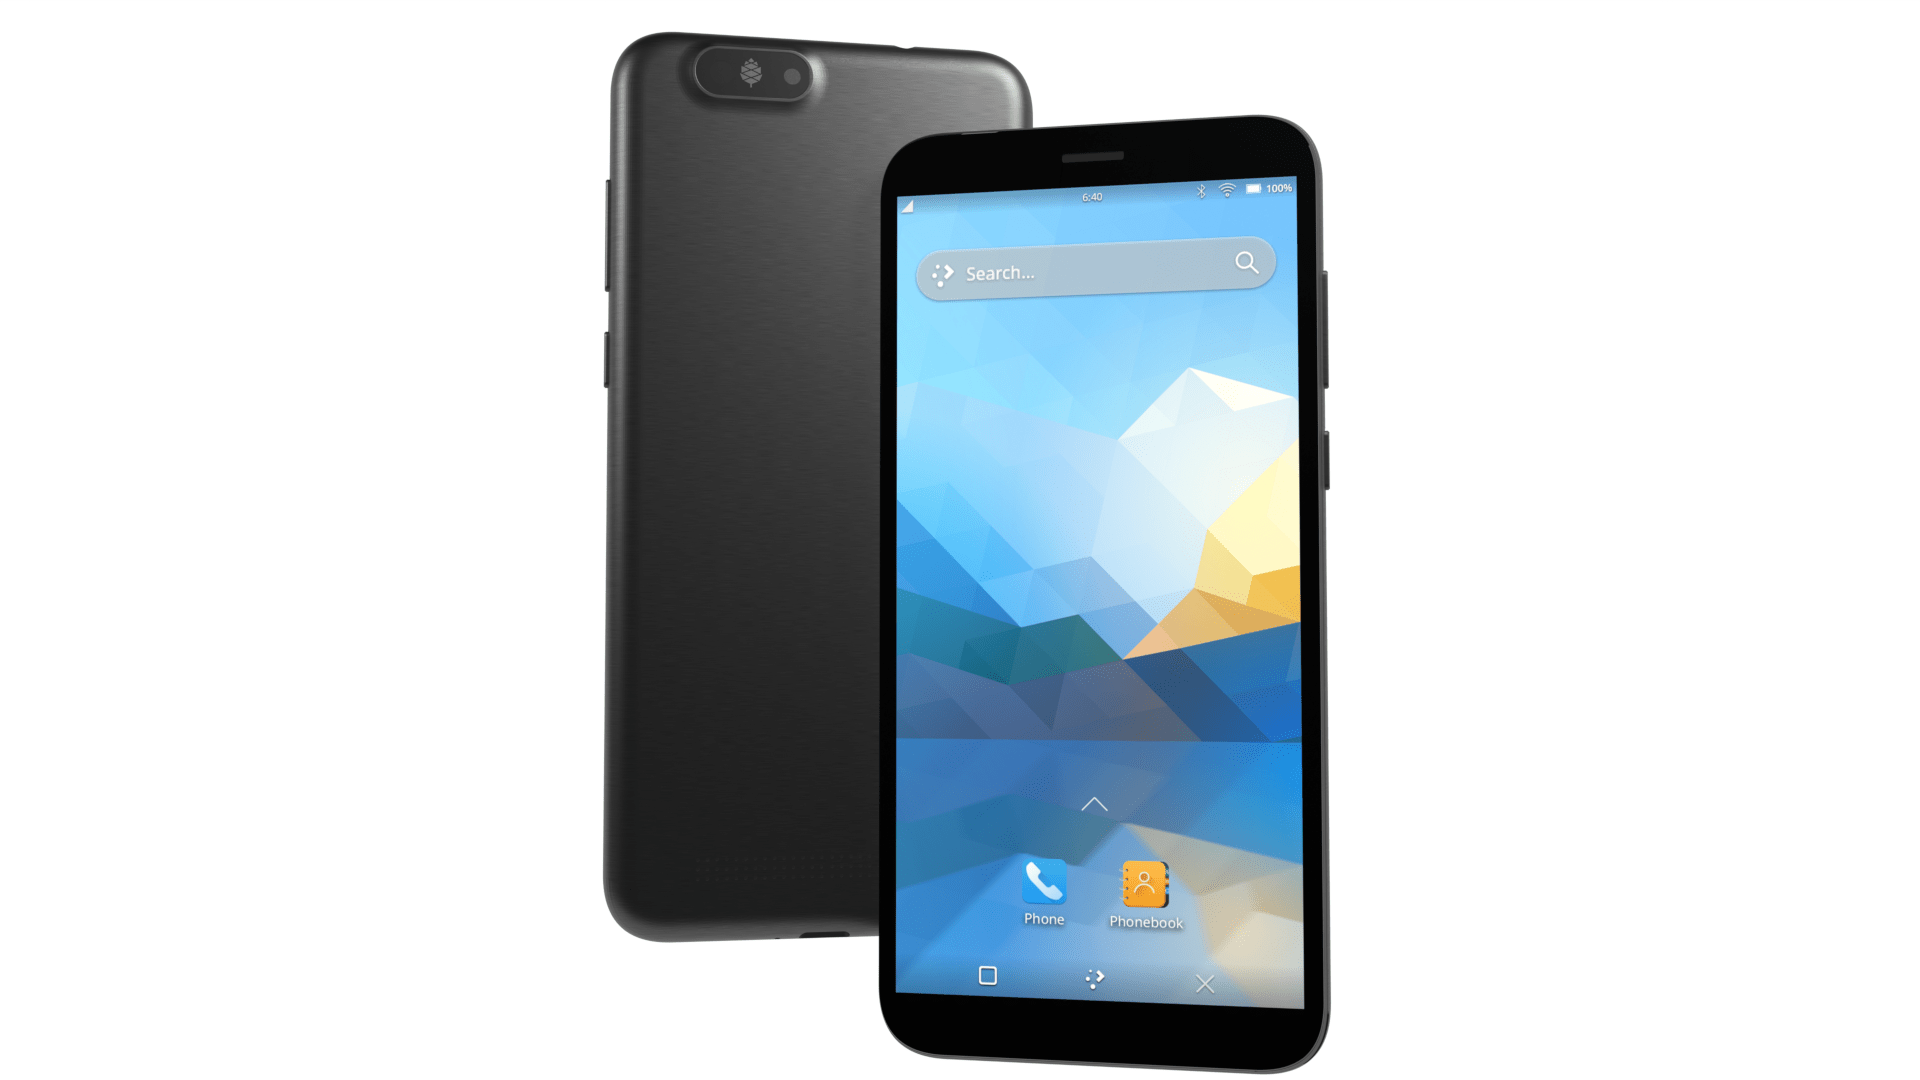
The PinePhone Pro is PINE64's flagship smartphone announced on October 15, 2021. It features 4GB of RAM, an 128GB eMMC and is using an Rockchip RK3399S SoC, which is a specialized version of the RK3399 made specifically for the PinePhone Pro.
Introduction
The PinePhone Pro is PINE64’s second smartphone and a successor to the original PinePhone. It does not, however, replace the original PinePhone. It should also not be considered a second generation PinePhone; it is a higher-end device, with much better specs, aimed at those who wish to daily-drive a open system stack. Achieving this goal will, however, take time as the software and overall smartphone software ecosystem needs to mature.
More information about the PinePhone Pro can be found on the device main page.
State of the software
Presently, at the time of writing (late 2021), the PinePhone Pro is aimed solely at early adopters and developers. It will take time for all the PinePhone Pro’s functionality to reach software parity with the original PinePhone and for mobile operating systems, in more general, to reach a higher degree of maturity.
Bear in mind that the software for these smartphones is still in a very early stage, with most of the software being in alpha or beta state. That's especially also the case for scalability of applications, their availability and practicability, any hardware function implementations and the firmware. The software is provided as is. There is no warranty for the software, not even for merchantability or fitness for a particular purpose.
If you have any questions regarding the current state of the software or of specific features working, please don't hesitate to ask in the community chat (see Main Page#Community and Support)!
Editions and revisions
Similarly to the original PinePhone, various PinePhone Pro editions are planned, the first of which is the Developer Edition (aimed at developers, as the name entails) followed by the Explorer Edition, which is aimed at early adopters.
Help and support
Still have any questions regarding software, shipping, or ordering after reading this Wiki? Please don't hesitate to contact the community in the bridged community channels for detailed answers or simply to chat with friendly people in the community! See Main Page#Community and Support.
Please keep in mind that PINE64 is not like a regular company (see PINE64 philosophy), and currently that support resources are sparse - the best way to get support quickly is to ask in the community chat! Please only contact PINE64 directly if questions couldn't be solved via the community chat or this wiki.
First time setup
When shipped the battery is isolated from the mainboard contacts using a protective plastic tab, which is required to be removed before using the phone. The battery will not charge until it is removed and some of the device’s functionality may not function properly.
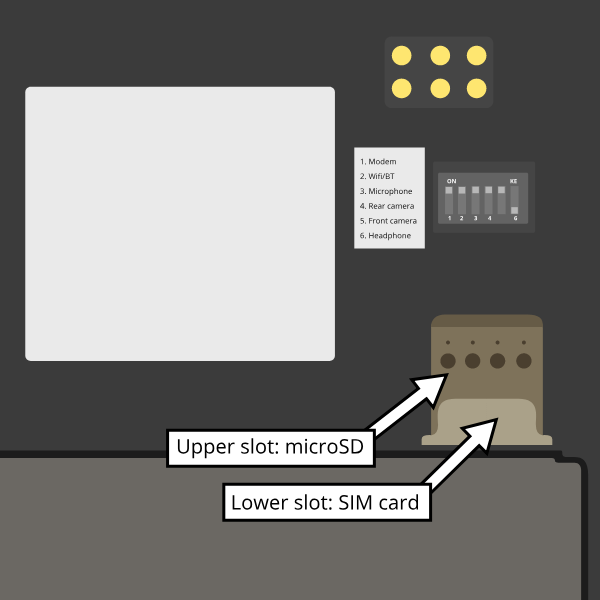
The PinePhone Pro's SIM slot only accepts a micro SIM, please do not insert a nano SIM without an adapter. The SIM card has to be placed in the lower slot, while the microSD has to be placed in the upper slot. Notice: Do not insert an empty micro SIM adapter into the phone, as it will get stuck on the contact pins. An adapter from a nano to a micro SIM is included in the box.
To remove the sticker after unboxing the phone:
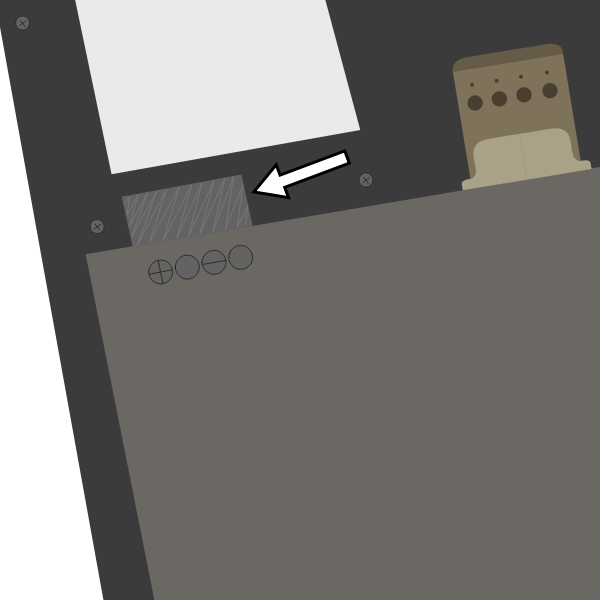
- Carefully remove the back panel using the notch in the corner of the back cover without overbending it
- Remove the battery (if the battery is stuck in the device please check this paragraph for a fix)
- Peel off the clear plastic sticker below it, which isolates the charging contacts
- Reinsert the battery
Software
At the time of the release, in late 2021, the PinePhone Pro is in an early development stage. That said, the device has benefited greatly from work done on the original PinePhone, which means that even early development images feature all core functionality, such as: functional UI, sensors and even the modem (to a degree).
The development is expected to proceed very quickly compared to progress done on the original PinePhone as much of the fundamental work can carry over to the new device. You can follow development efforts on Megi's blog, the dedicated PinePhone Pro Development section as well as on individual project’s Wiki’s and repositories.
Boot order
On the PinePhone Pro the eMMC (the internal storage of the phone) has a higher boot priority than the microSD card (see RK3399 boot sequence#Boot sequence details for details regarding the boot sequence). That behavior is in contrast to the original PinePhone with the Allwinner A64 SoC, where the microSD card has a higher boot priority.
The Explorer Edition comes with a modified U-Boot pointing to the microSD card pre-installed to the eMMC. The microSD card can be (temporarily) booted instead of the pre-installed operating system, when the power key is shortly held at boot. To always boot from the microSD card it is recommended to wipe U-Boot from the eMMC. When the pre-installed bootloader was overwritten with a bootloader without such a configuration, the RE button underneath the back cover of the phone can also be used to temporarily bypass the eMMC. The button may however only be pressed shortly for a few seconds during boot, otherwise the eMMC won't be initialized in the operating system.
The Developer Edition, which was an earlier revision intended for development, was coming with an Android factory OS preinstalled. For details regarding how to remove the bootloader and the preinstalled OS of the eMMC for Developer Edition, please see the relevant wiki article. The eMMC on the Developer Edition can be bypassed by shorting two specific contact points, please join the community chat for any questions regarding the process.
Installation instructions
As explained in the boot order section, the eMMC has a higher boot priority than the microSD card. On the Explorer Edition the default installation of U-Boot shipped by the factory points to the microSD card when holding the power key at boot. If the default installation was corrupted or overwritten by a differently configured bootloader, the eMMC may have to be bypassed to boot from microSD card and to alter the eMMC contents.
If that's the case please start your phone in Maskrom mode and let it charge in that for a few hours. To do that:
- Remove any microSD card from the phone
- Hold the "RE" button underneath the back cover of your Explorer Edition (or shorting the bypass contact points on the Developer Edition)
- Connect the phone to an USB port of a computer, while still holding the button
- Check if the phone in Maskrom mode appears in the output of the Linux command
lsusbon the computer (if the device disappears again please use a different cable) - Let the phone charge for multiple hours.
Note: If that didn't work, try to remove the battery and the USB cable and hold the power button for a few seconds and then insert the battery again, before retrying the procedure.
Flashing to microSD card
To install an image to the microSD card:
- Download your chosen image from PinePhone Pro Software Releases
- Extract the compressed file
- Write the image to your microSD card using your favorite method, examples:
- Using dd: On the device you're flashing the microSD card from, find the correct device under
lsblkand then flash the image to the microSD card usingsudo dd if=pine.img of=/dev/[DEVICE] bs=1M status=progress conv=fsync. Make sure the target is the whole microSD card and not its first partition (sdc1 or nvme0n1p1 are wrong!). - Using bmaptool: Make sure to select the correct device using
lsblk. Then run bmaptool with the correct device: Download the .img.xz and the .img.bmap files, then runbmaptool copy --bmap image.bmap image.xz /dev/[DEVICE]. This takes around 2.5 minutes to flash a 4 GB file. - Using a graphical tool: A graphical tool such as Gnome Disks under Linux or Etcher under Windows may also be used.
- Using dd: On the device you're flashing the microSD card from, find the correct device under
- Insert the microSD card into the top slot of the phone
- Boot the phone. If there is an existing bootloader on the eMMC (the eMMC has a higher boot priority) you need to bypass the eMMC at boot and you can wipe the bootloader from the eMMC to default boot from the microSD card by default in the freshly booted installation.
Flashing to the eMMC
Please help to review and edit this page or section. Information are subject to change.
Bypassing the eMMC
The pre-installed bootloader of the operating system the Explorer Edition came with can boot the microSD card when holding the power button at boot for a few seconds. The eMMC can be temporarily bypassed at boot to be able to boot from microSD card, for example if the installation of U-Boot on the eMMC got corrupted or overwritten by a differently configured bootloader. To bypass the eMMC in such a case:
On the Explorer Edition hold the RE button underneath the cover for a few seconds, while powering on the device (holding it too long will cause the eMMC to not get initialized after the boot).
On the Developer Edition short the eMMC bypass contacts while booting.
For details see the section boot order.
Wipe U-Boot from the eMMC
To boot from microSD card permanently, one of the methods is to wipe the bootloader from the eMMC. If no bootloader is found on the eMMC, the phone will boot to the microSD card instead. To wipe U-Boot from the microSD card:
- Boot a GNU/Linux operating system from the microSD card by holding power at boot (or using the above bypass method if the bootloader was altered or the Developer Edition is used)
- Type
lsblkin a terminal on the phone to list the devices - Wipe the bootloader using
sudo dd if=/dev/zero of=/dev/mmcblk2 bs=8k seek=1 count=4
The phone should now default to the microSD card at boot. If the phone still tries to boot from the eMMC first, repeat the procedure but wipe a larger part of the eMMC using sudo dd if=/dev/zero of=/dev/mmcblk2 bs=8M count=4.
If there are any issues please join the bridged community PinePhone channel and explain your issue and what you've tried so far.
Software releases
The PinePhone Pro Software Releases page has a complete list of currently supported phone-optimized operating system images that work with the PinePhone Pro.
Specifications
- Dimensions: 160.8 x 76.6 x 11.1mm
- Weight: Approx. 220g
- SIM Card: Micro-SIM
- Display:
- Size: 6 inches (151mm) diagonal
- Type: 1440 x 720 in-cell IPS with Gorilla Glass 4™
- Resolution: 1440x720, 18:9 ratio
- System on Chip: Rockchip RK3399S 64bit SoC – 2x A72 and 4x A53 CPU cores @ 1.5GHz
- RAM: 4GB LPDDR4 @ 800MHz
- Internal Storage: 128GB eMMC, extendable up to 2TB via microSD, supports SDHC and SDXC
- Back Camera: 13MP Sony IMX258 with Gorilla Glass 4™ protective layer, LED Flash
- Front Camera: 8MP, OmniVision OV8858 front-facing camera
- Sound: Loudspeaker, 3.5mm jack & mic (jack doubles as hardware UART if hardware switch 6 is deactivated)
- Communication:
- Modem: Quectel EG25-G
- LTE-FDD: B1, B2, B3, B4, B5, B7, B8, B12, B13, B18, B19, B20, B25, B26, B28
- LTE-TDD: B38, B39, B40, B41
- WCDMA: B1, B2, B4, B5, B6, B8, B19
- GSM: B2, B3, B5, B8 (850, 900, 1800, 1900 MHz)
- WLAN & Bluetooth: Wi-Fi 802.11AC, hotspot capable + Bluetooth V5.0
- GNSS: GPS/GLONASS/BeiDou/Galileo/QZSS, with A-GPS
- Sensors: Accelerometer, gyroscope, proximity, ambient light, compass
- Privacy switches: Modem, WiFi & Bluetooth, Microphone, Cameras
- Battery: Lithium-ion, rated capacity 2800mAh (10.64Wh), typical capacity 3000mAh (11.40Wh) (nominally replaceable with any Samsung J7 form-factor battery)
- I/O: USB Type-C, USB Host, DisplayPort Alternate Mode output, 15W 5V 3A Quick Charge, follows USB PD specification
Privacy switch configuration
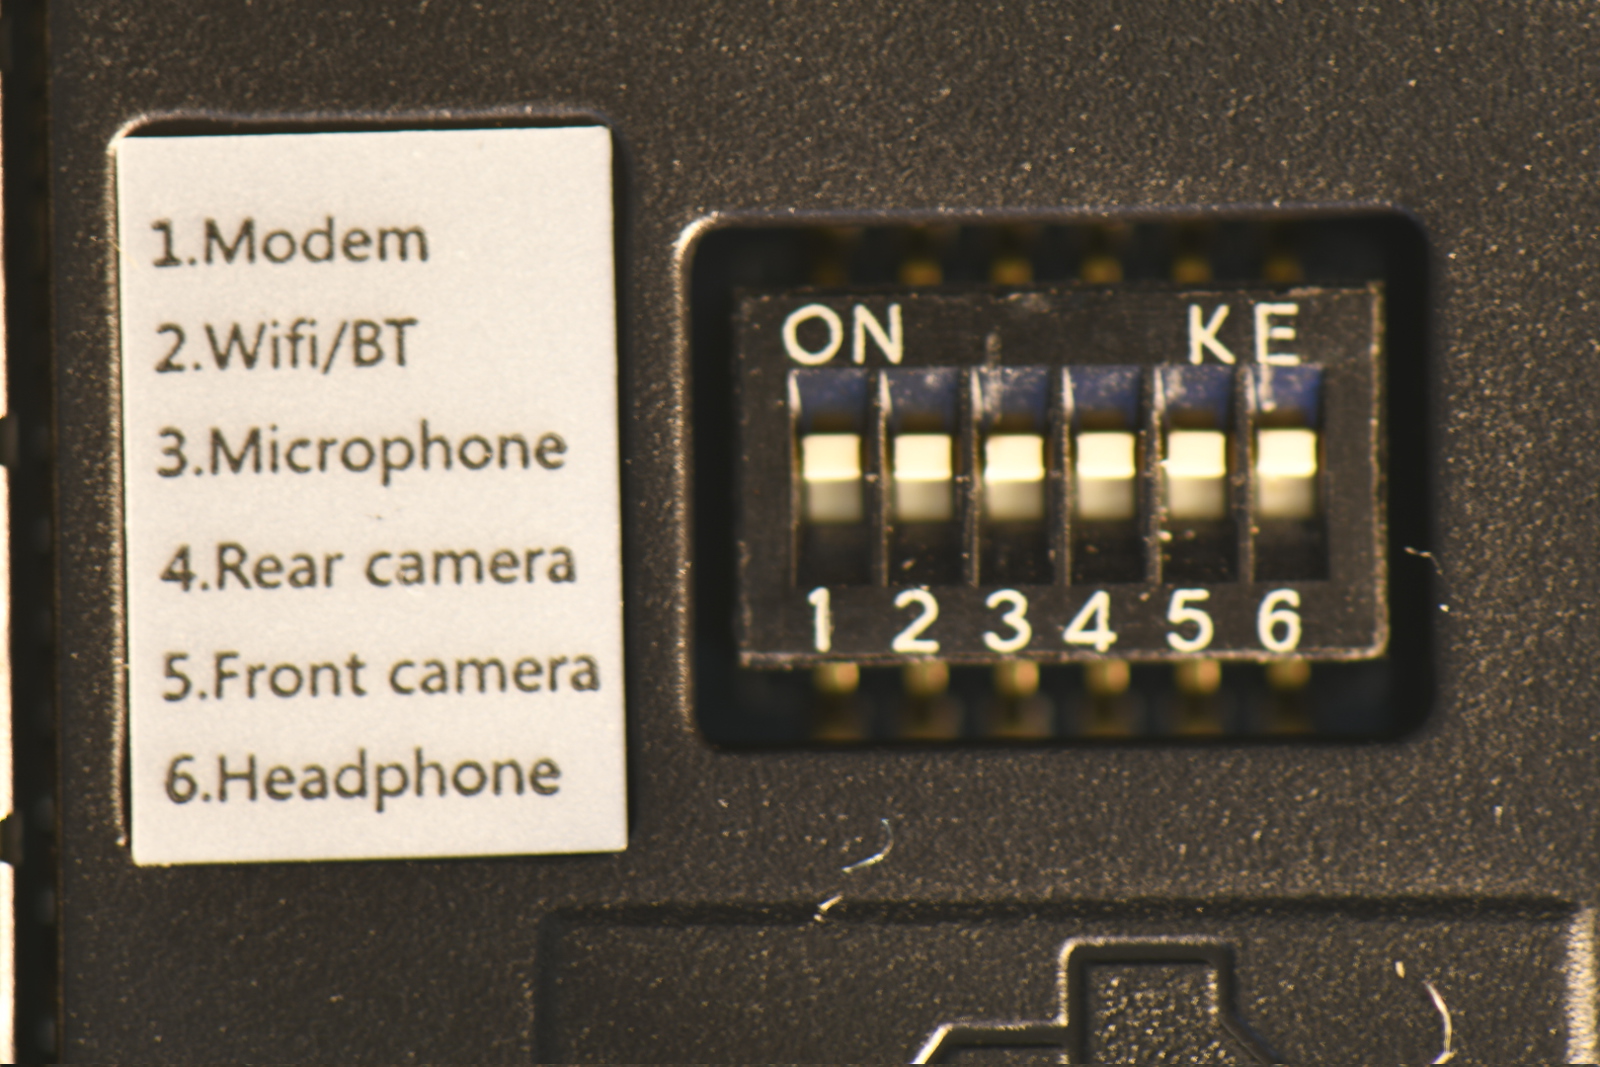
The PinePhone features six switches that can be used to configure its hardware. They are numbered 1-6, with switch 1 located nearest to the modem. Their "on" position is toward the top of the phone.
| Number | Name | Description |
|---|---|---|
| 1 | Modem | "On" enables 2G/3G/4G communication and GNSS hardware, "off" disables it. |
| 2 | WiFi / Bluetooth | "On" enables WiFi and Bluetooth communication hardware, "off" disables it. |
| 3 | Microphone | "On" enables audio input from on-board microphones (not 3.5 mm jack), "off" disables it. |
| 4 | Rear camera | "On" enables the rear camera, "off" disables it. |
| 5 | Front camera | "On" enables the front camera, "off" disables it. |
| 6 | Headphone | "On" enables audio input and output via the 3.5 mm audio jack, "off" switches the jack to hardware UART¹ mode. |
¹ Note: The baud rate may be 1500000 instead of 115200.
Components
| Component | Model |
|---|---|
| Touchscreen | |
| Rear camera | IMX258 |
| Camera flash | AW3641EDNR |
| Front camera | OV8858 |
| LCD | |
| WiFi + Bluetooth | AzureWave AW-CM256SM |
| Modem | Quectel EG25-G |
| GNSS/GPS | Quectel EG25-G |
| 3 Axis Magnetometer | ST LIS3MDL |
| Geo Magnetic Sensor | Voltafield AF8133J |
| Ambient light / Proximity | STK3311-A |
| Accelerometer / Gyroscope | TDK MPU-6500 |
| Vibration motor | |
| Notification LED | |
| Audio Codec | ALC5616 and ALC5640 |
| Volume buttons | Buttons connected to the KEYADC |
| Power button | |
| Battery fuel gauge | RK818 |
Datasheets, schematics and certifications
- PinePhone Pro mainboard schematic:
- PinePhone Pro USB-C small board schematic:
- TBD
- Certifications:
Press
For an overview about media of the PinePhone Pro you can use for the news, blogs, or similar see PinePhone Pro Press.
External links
- Product Page
- Announcement video
- Blog post with the announcement


