Difference between revisions of "Quartz64 Model A Using a battery"
| Line 62: | Line 62: | ||
<pre> | <pre> | ||
// add this to root node | // add this to root node (you may need to modify the values to fit your chosen battery) | ||
battery: battery { | battery: battery { | ||
compatible = "simple-battery"; | compatible = "simple-battery"; | ||
Revision as of 04:17, 12 March 2023
The Quartz64 Model A allows for it to be powered from a single-cell 3.7V lithium-polymer battery. Because of unfortunate incidents, batteries are not easy to ship internationally, so PINE Store does not sell a matching battery for the board.
Pin-out
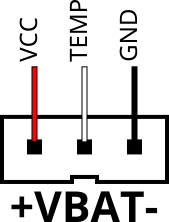
The pins on the board are a JST PH-3 compatible header labelled +VBAT-. As one might guess, the positive wire should be towards the +, and the ground wire towards -. The center pin of the connector is for a temperature probe.
Ways to get a battery
We will now go into various ways one might go about getting a working battery.
Crimping one yourself
You will need:
- an Engineer PA-20 (Amazon Search, eBay Search) or Hozan P-707 (Amazon Search, eBay Search) or similar crimp tool (<$80, good to have around anyway)
- The Hozan P-707 is also comparatively good at crimping "Dupont"-style terminals, in case you find yourself doing that a lot, because it provides round crimping holes in addition to rectangular ones.
- JST PHR-3 receptacles (~$0.05 on digikey)
- 3× JST SPH-002T-P0.5L crimp terminals (~$0.03 on digikey per terminal)
- When ordering from digikey, try to hit the minimum order cost to qualify for free shipping; you'll get free fast courier shipping with all customs and duties pre-paid.
- a single-cell 3.7V lithium-polymer battery, ideally with a temperature probe
- 2800 mAh Renata ICP606168PRT on Conrad Germany, Conrad Switzerland
- 2000 mAh Adafruit on Adafruit US (no temperature probe, pre-crimped with JST PHR-2; just lift up the plastic tabs and pull out the terminals and shove them back into a PHR-3 connector)
- Aliexpress: try keywords "3.7v lithium battery temperature probe"
Crimp the terminals onto the wires, crimp the strain relief onto the insulation, slide them into the connector until they firmly click in place.
PINE64 18650 battery case
You will need:
- PINE64 Lithium Battery Casing
- an 18650 sized lithium battery (not LiFePo4!)
TODO: Get one of these and document how to use them
Using the battery
Hardware
- Ensure the wires in the connector are in the right order.
- Turn off your Quartz64 Model A.
- Remove the BAT ON/OFF jumper.
- Plug in your battery.
- It is now ready to use if your device tree has been set up correctly.
Caveats
Not all parts of the board can be supplied from the battery. When you use battery as backup power for the board keep in mind that following parts of Quartz64-A will lose power when DCIN loses power:
- 12V Fan connector
- EDP LCD backlight
- 5V power rails on the 20 pin GPIO header
- PCIe socket (both 12V and 3.3V supplies)
- All USB ports except for the black one
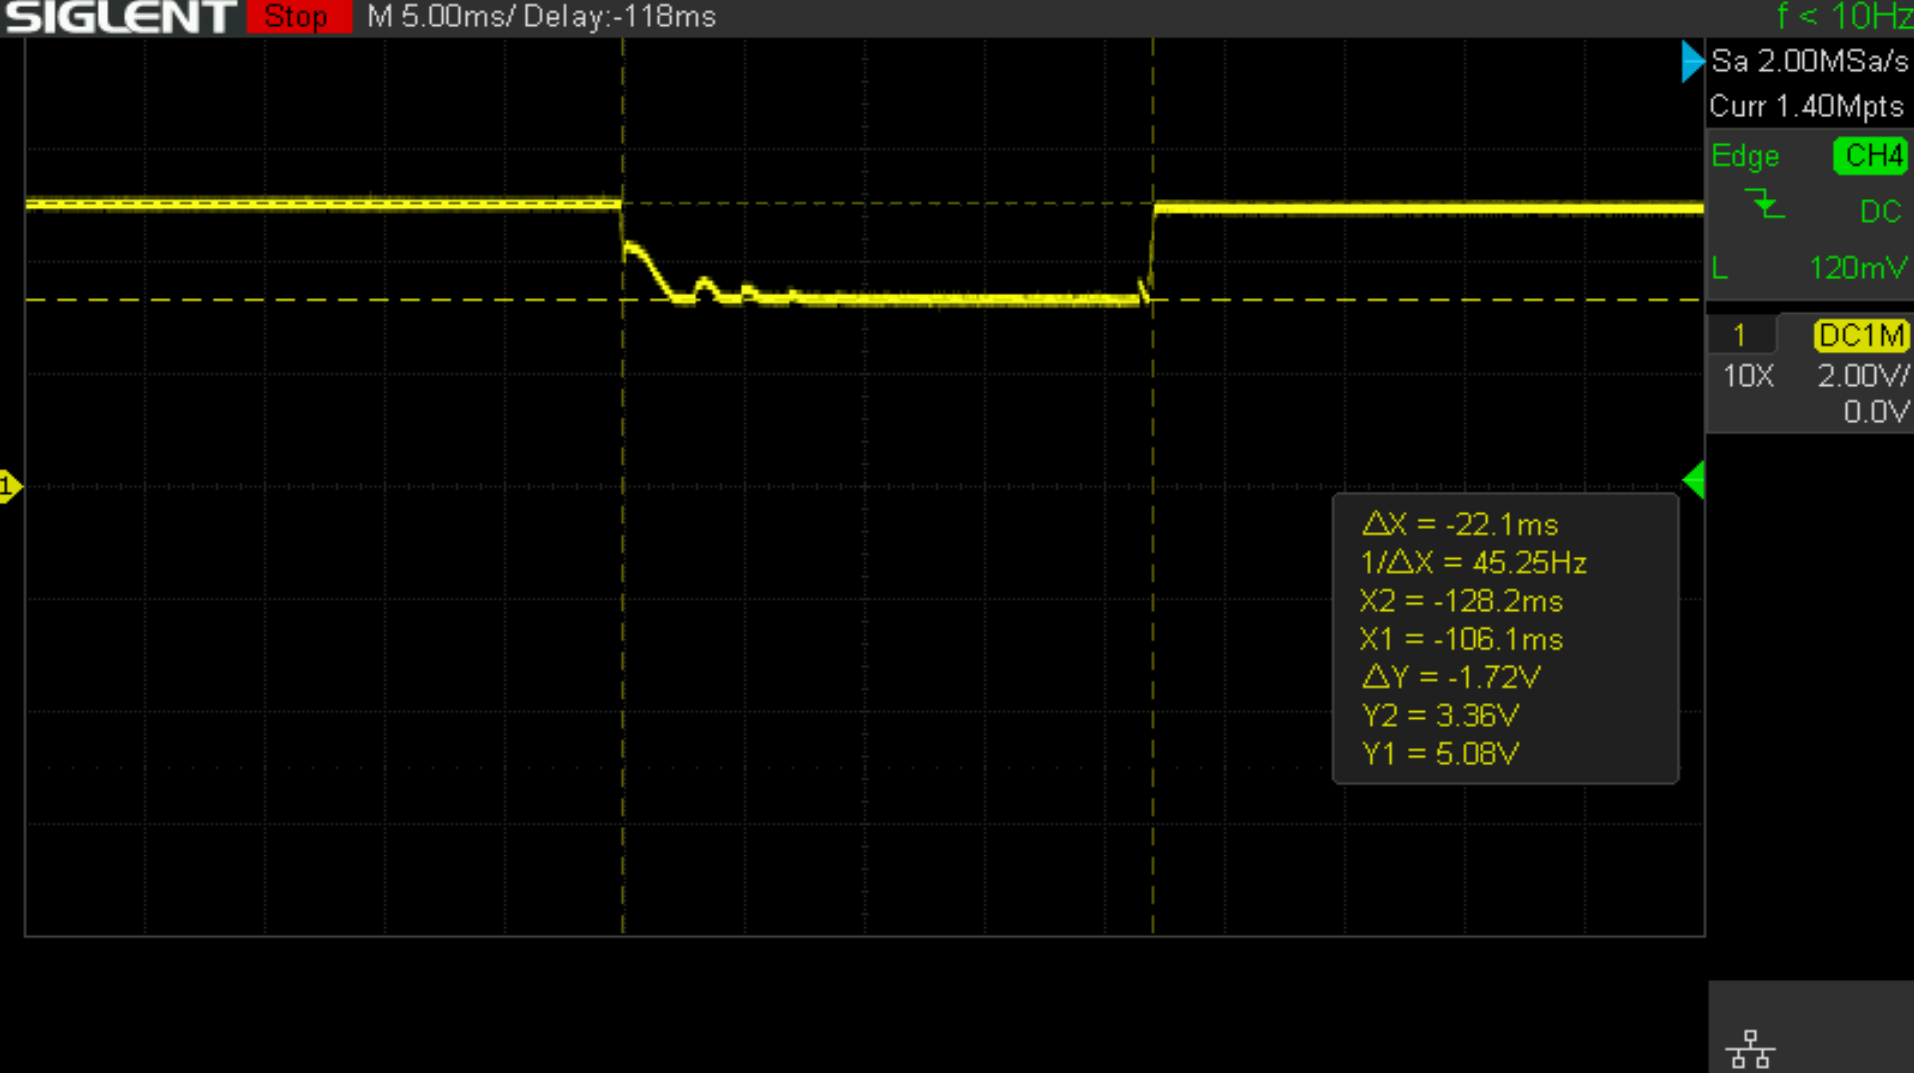
- Black USB port's VBUS (the one above the USB 3.0 port) will go through a 22ms brownout to approximately VCC_SYS - 0.6V voltage, before the RK817 BOOST regulator kicks in. This will likely cause the connected USB device to reset or have its internal state corrupted.
Software
For the battery to be correctly detected, you will need to edit the device tree to add the charger and battery nodes, like this:
	// add this to root node (you may need to modify the values to fit your chosen battery)
	battery: battery {
		compatible = "simple-battery";
		charge-full-design-microamp-hours = <6400000>;
		charge-term-current-microamp = <200000>;
		constant-charge-current-max-microamp = <2000000>;
		constant-charge-voltage-max-microvolt = <4200000>;
		factory-internal-resistance-micro-ohms = <117000>;
		voltage-max-design-microvolt = <4200000>;
		voltage-min-design-microvolt = <3200000>;

		ocv-capacity-celsius = <20>;
		ocv-capacity-table-0 =  <4200000 100>, <4054000 95>, <3984000 90>, <3926000 85>,
					<3874000 80>, <3826000 75>, <3783000 70>, <3746000 65>,
					<3714000 60>, <3683000 55>, <3650000 50>, <3628000 45>,
					<3612000 40>, <3600000 35>, <3587000 30>, <3571000 25>,
					<3552000 20>, <3525000 15>, <3492000 10>, <3446000 5>,
					<3400000 0>;
	};

	// add this to &rk817 node
	rk817_charger: charger {
		monitored-battery = <&battery>;
		rockchip,resistor-sense-micro-ohms = <10000>;
		rockchip,sleep-enter-current-microamp = <300000>;
		rockchip,sleep-filter-current-microamp = <100000>;
	};
You will also need to make sure that CONFIG_CHARGER_RK817 is enabled in your kernel.

