Difference between revisions of "Pinecil Hall Effect Sensor"
Jump to navigation
Jump to search
| Line 8: | Line 8: | ||
=== Hints === | === Hints === | ||
# It is recommended to update to the newest | # It is recommended to update to the newest firmware before installing, see the [https://wiki.pine64.org/wiki/Pinecil#Firmware_&_Updates Firmware article]. | ||
# Try not to overheat the sensor as that could damage it and even cause a leg to fall off. This is a very small SOT23 chip. It is recommended to solder one pin on the 2-pin side to tack it in place before soldering the rest of the sensor. | # Try not to overheat the sensor as that could damage it and even cause a leg to fall off. This is a very small SOT23 chip. It is recommended to solder one pin on the 2-pin side to tack it in place before soldering the rest of the sensor. | ||
Revision as of 00:56, 23 February 2023
Instructions to Install a Hall Effect Sensor (HES)
Installation
- The Hall Effect Sensor (HES) is an optional end user installed sensor that activates to put pinecil to sleep when it enters a holder or stand. This requires a magnet attached to the stand. The closet the HES in the pinecil is to the magnet, the more likely the HES will activate. This adds a feature to Pinecil that is often seen in high end pro irons.
- See this article explaning how the Hall Effect Sensor (HES) works with Pinecil firmware, Ralim's IronOS.
- Order an SI7210-B-00 HES here, also available on Digikey and Mouser.
- Ordering 2-3 might be a good idea in case the first one is damaged during install (if all goes well, could mail the extra to a friend or Pine64 member).
Hints
- It is recommended to update to the newest firmware before installing, see the Firmware article.
- Try not to overheat the sensor as that could damage it and even cause a leg to fall off. This is a very small SOT23 chip. It is recommended to solder one pin on the 2-pin side to tack it in place before soldering the rest of the sensor.
Supplies
- Borrow a second soldering iron (this is when 2x pinecils is a good idea).
- Get some neodymium magnets, even just two 8x2.7mm at 8:00PM and 12:00PM on the stand could be enough. Experimentation is needed. Start with just one small magnet and increase the number places on the stand until 360° sleep is activated when the pinecil hits the stand.
- Lamp with a Magnyfying glass or Jeweler's magnyfying glasses or a microscope is recommended.
- If the stand/holder is not metal, one could hot glue or tape magnets to it.
Images
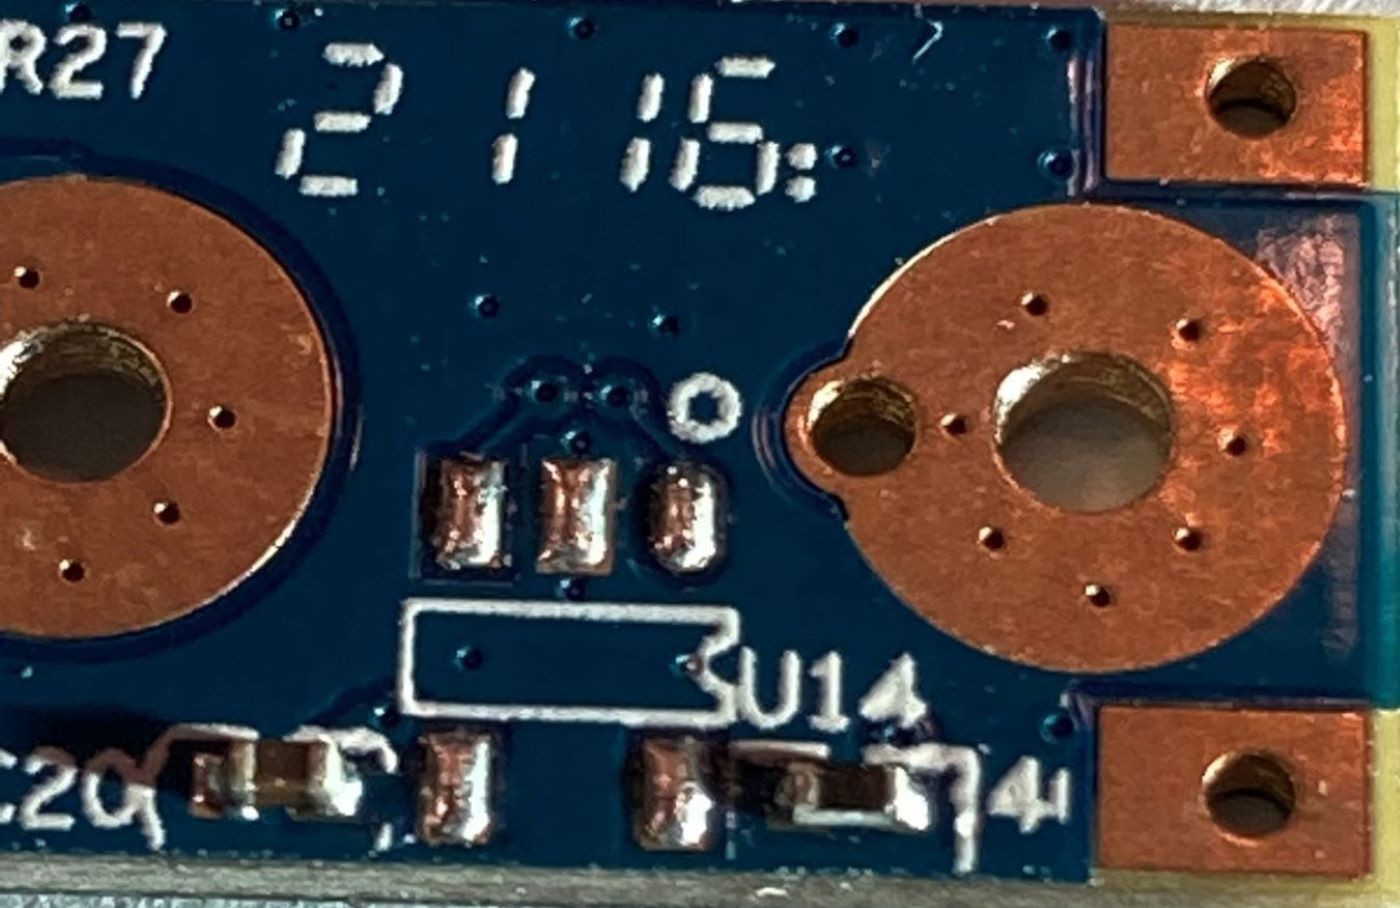
HES before photo, U14 location
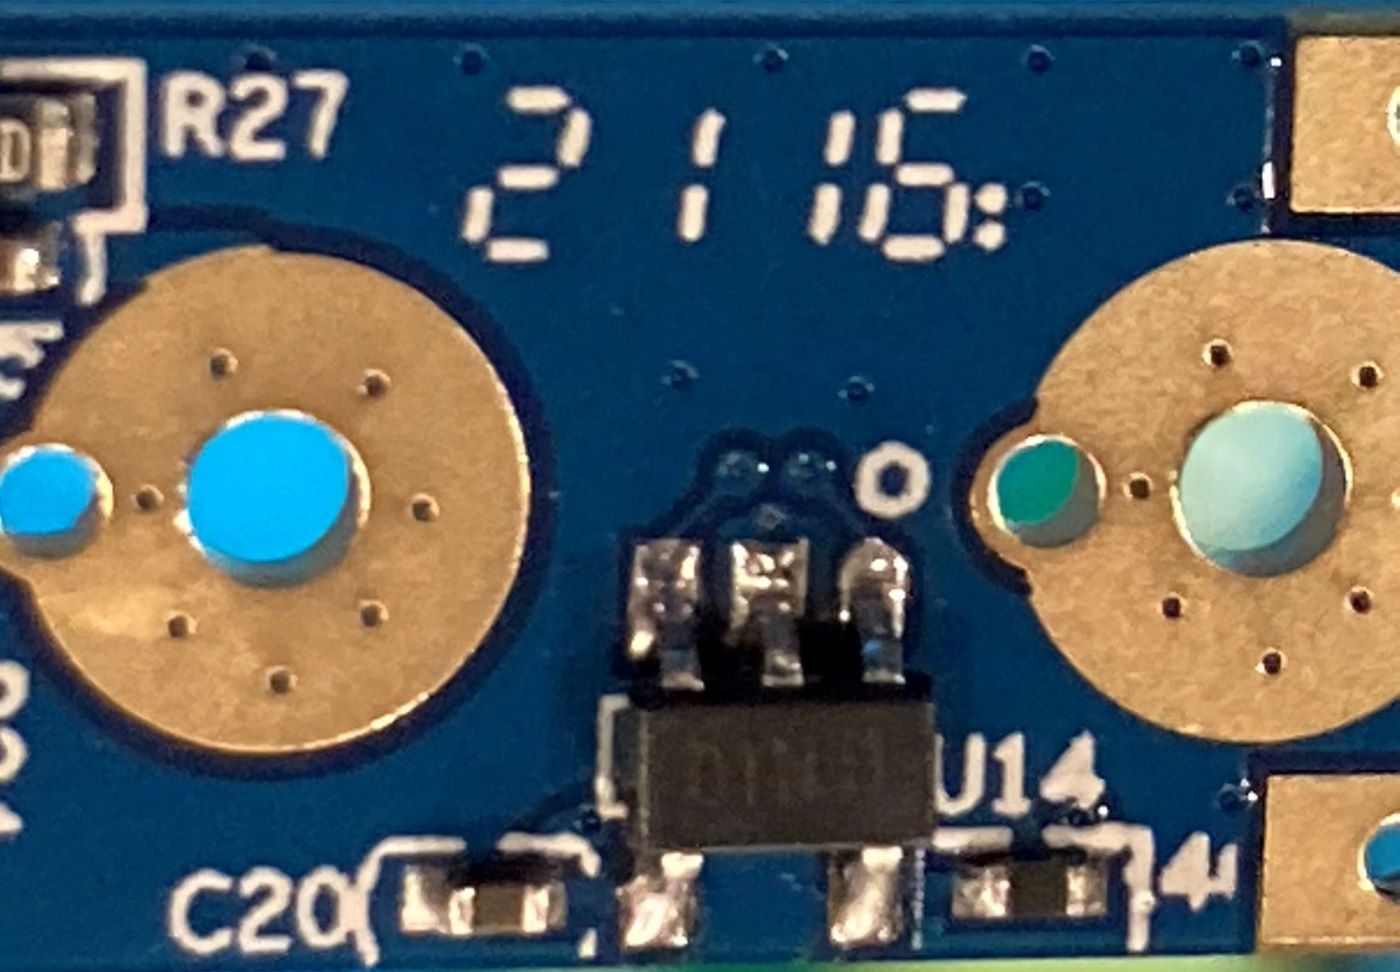
HES after photo


Videos
- Easy trick to Open Pinecil without damaging clips.
- Installation (not available yet).
Go back to Pinecil article
Go back to Pinecil article.