Pinecil Guides to Soldering
This article is a list of convenient links to guides on soldering. Although it's not directly related to Pinecil hardware, many PINE64 members ask for this kind of information in daily live chat. If you don't find something here, then try an Internet search as this is just a starting point for convenience.
General soldering guides
- Why have different tips?
- Easier method to solder SMD, and a clever Cleaning method
- How to Solder SMD & Small Components - Mr. Solder
- Pace Basic Soldering lesson 1-9
- How to Desolder/Correct mistakes
- Mr. Solderfix - Remove Components
- Ultimate soldering guide
- Should I switch to Lead-free solder?
- Beginner's Guide to Soldering - Mr. Solder
- Fine SMD Soldering
- Comic book - Soldering
Does solder type and flux matter?
How to keep the tip clean?
What temperature should I use?
1. General Formula: add 120°C to the melting point listed on the solder label, and adjust up/down as needed for different tasks.
- Example: the solder says 220°C melt point, then
220 + 120 = 340 °C - One could also try these common working temperatures below, start lower and increment by 5°C until you get a comfortable working temperature (thicker wires & situations dictate more or less).
Common working temperatures if direct data for the solder can not be found:
# For Lead solder: 300°C - 320°C
# For No-lead solder: 350°C - 365°C
2. Another method is an Internet search to find a chart like below for your specific type of solder alloy:
3. Adding a small amount of solder to your tip before starting increases the thermal mass of the tip and could help instead of cranking the temperature super high (which causes other problems). See the soldering guides above for demonstrations of this in several articles and videos.
Using the Conical tip
How do I use the conical tip that comes default with Pinecil to get enough heat transfer?
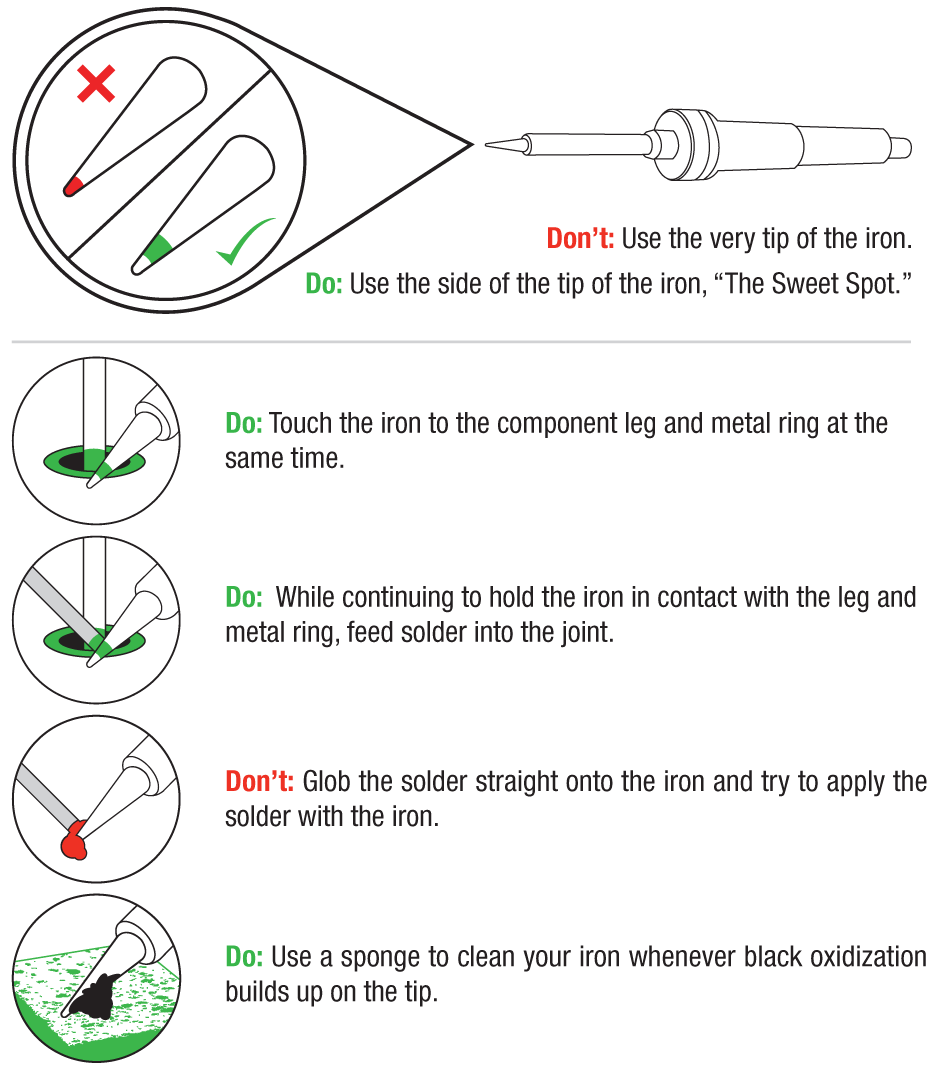
1. Use the side of the tip to heat the pin. Do not hold it vertically like a pen because the very end of the tip has little heat mass. See
https://cdn.sparkfun.com/assets/learn_tutorials/5/8/4/SolderingAdvice_1edit.png
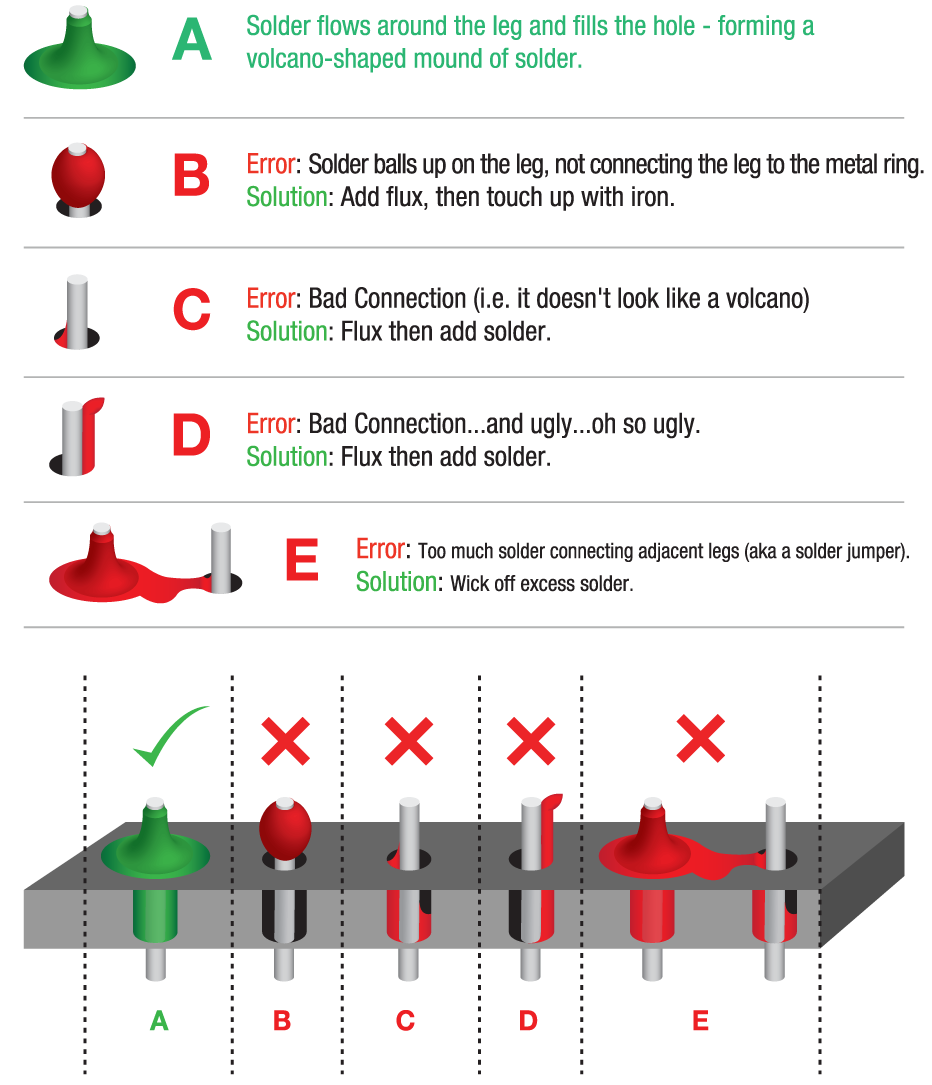
2. Correct amount of solder and solder flow. See https://cdn.sparkfun.com/assets/learn_tutorials/5/8/4/SolderingAdvice_2.png