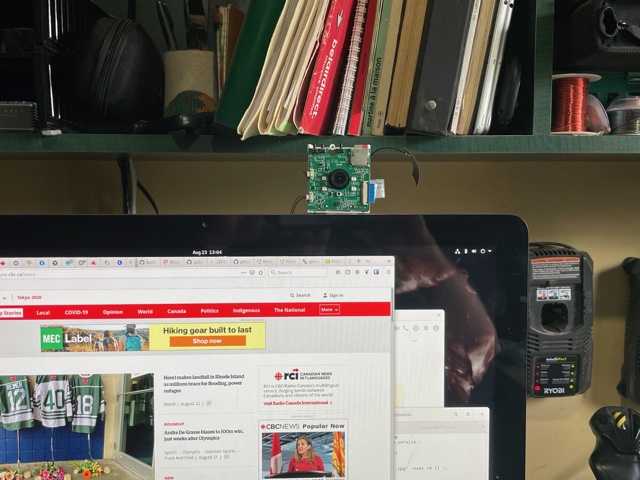
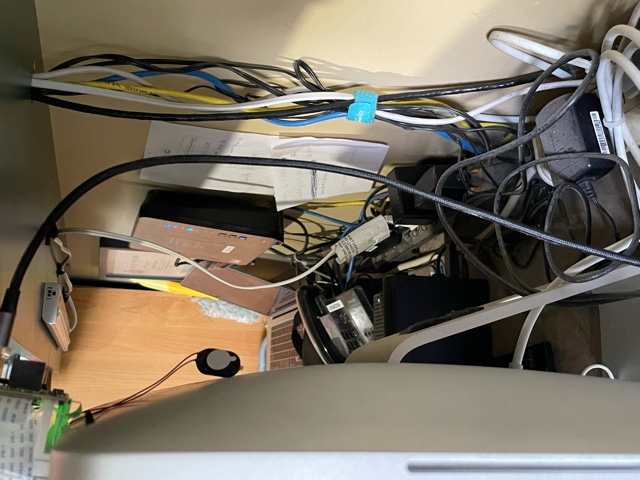
PineCube as a webcam
The PineCube can be powered by the host and communicate as a peripheral. First, you'll need to a dual USB-A (male) cable to plug it into your computer. Note that the Micro-USB port can be used only for power because the data lines are not connected.
Pictures
USB as an Ethernet gadget
Goal: To achieve fast (low latency) wired network connection via USB-A port of PineCube. PineCube will be shown as a network device when connected to a computer via USB-A port. You can set up the computer to be in the same network as PineCube and connect to PineCube via SSH and/or Stream Videos from it.
1. Additional patch to PineCube device tree disable ehci0 and ohci0, enabling usb_otg device instead and setting dr_mode to otg. If otg is not working for you, try setting dr_mode to peripheral. On Armbian there is no need for disabling ehci0 and ohci0. Device tree can be edited via armbian-config tool on Armbian OS. (armbian-config -> System -> DTC)
- sample DTC on Armbian:
               -----

               usb@1c19000 {
                       compatible = "allwinner,sun8i-h3-musb";
                       reg = <0x1c19000 0x400>;
                       clocks = <0x03 0x1d>;
                       resets = <0x03 0x11>;
                       interrupts = <0x00 0x47 0x04>;
                       interrupt-names = "mc";
                       phys = <0x0e 0x00>;
                       phy-names = "usb";
                       extcon = <0x0e 0x00>;
                       status = "okay";
                       dr_mode = "otg";
                       phandle = <0x2c>;
               };

               -----
2. Load necessary kernel modules. You can skip this step if you use Armbian OS because necessary modules are already loaded by default (Detailed instructions for sunxi and Ethernet gadget: https://linux-sunxi.org/USB_Gadget/Ethernet)
modprobe sunxi
modprobe configfs
modprobe libcomposite
modprobe u_ether
modprobe usb_f_rndis
3. Add sunxi and g_ether to /etc/modules to get them to load on startup
/etc/modules:
sunxi
g_ether
4. Configure the g_ether device to start with a stable MAC address
/etc/modprobe.d/g_ether.conf:
options g_ether host_addr=f6:11:fd:ed:ec:6e
5. Set a static IP address for usb0 on startup with network manager
/etc/network/interfaces:
  auto usb0
  iface usb0 inet static
      address 192.168.10.2
      netmask 255.255.255.0
6. Boot the PineCube plugging it into a computer 7. Configure the USB Ethernet device on the computer to be in the same subnet as the PineCube
- Sample setting:
network setting: Manual
address: 192.168.10.5
netmask: 255.255.255.0
gateway: 192.168.10.2
8. Done. You can use above methods to stream video through this USB Ethernet connection. Bandwidth and response time is much faster compared to usual network methods
USB as a Webcam (UVC) gadget (Work In Progress)
Goal: Make PineCube behave almost as same as like normal Webcam. When you connect PineCube to a computer it will be shown as a webcam device. No need for an additional set up you can use it straight after plugging the PineCube to a computer. USB-A port is for data transfer between PineCube and computer/phone. Micro-USB port is for power.
Action Plan (by Newton688):
-Attempt to load the uvc_gadget (usb_f_uvc) or g_webcam
-Look at this project to see if it can bridge UVC gadget output with the v4l from the OV5650 camera sensor
 https://github.com/wlhe/uvc-gadget
Progress report so far (by Disctanger):
Configfs method is going to be used to control OTG port.
1. Additional patch to PineCube device tree disable ehci0 and ohci0, enabling usb_otg device instead and setting dr_mode to otg. If otg is not working for you, try setting dr_mode to peripheral. On Armbian there is no need for disabling ehci0 and ohci0. Device tree can be edited via armbian-config tool on Armbian OS. (armbian-config -> System -> DTC)
- sample DTC on Armbian:
               -----

               usb@1c19000 {
                       compatible = "allwinner,sun8i-h3-musb";
                       reg = <0x1c19000 0x400>;
                       clocks = <0x03 0x1d>;
                       resets = <0x03 0x11>;
                       interrupts = <0x00 0x47 0x04>;
                       interrupt-names = "mc";
                       phys = <0x0e 0x00>;
                       phy-names = "usb";
                       extcon = <0x0e 0x00>;
                       status = "okay";
                       dr_mode = "otg";
                       phandle = <0x2c>;
               };

               -----
2. Load necessary kernel modules.
modprobe sunxi
modprobe configfs
modprobe libcomposite
3. Set up camera so that it would capture images in YUYV format (Currently only supported format in UVC gadget). You can adjust resolutions but have to adjust Configfs set up step as well.
media-ctl --set-v4l2 '"ov5640 1-003c":0[fmt:YUYV8_2X8/640x480@1/30]'
4. Clone UVC gadget repo for raspberry pi to your PineCube
git clone https://github.com/peterbay/uvc-gadget.git
cd uvc_gadget
5. Comment out 1182~1185 lines of `uvc-gadget.c` file:
//    if (!uvc_shutdown_requested && ((uvc_dev.dqbuf_count + 1) >= uvc_dev.qbuf_count)) {
//        return;
//    }
6. Build the source code inside PineCube using make command. It takes only few seconds to build the code.
make
gcc -W -Wall -g   -c -o uvc-gadget.o uvc-gadget.c
gcc -g -o uvc-gadget uvc-gadget.o
7. Set up configfs (multi-gadget):
You can have the following script as a bash script as well.
 GADGET_PATH=/sys/kernel/config/usb_gadget/pinecube

 mkdir $GADGET_PATH


 echo 0x1d6b > $GADGET_PATH/idVendor
 echo 0x0104 > $GADGET_PATH/idProduct
 echo 0x0100 > $GADGET_PATH/bcdDevice
 echo 0x0200 > $GADGET_PATH/bcdUSB

 echo 0xEF > $GADGET_PATH/bDeviceClass
 echo 0x02 > $GADGET_PATH/bDeviceSubClass
 echo 0x01 > $GADGET_PATH/bDeviceProtocol

 mkdir $GADGET_PATH/strings/0x409
 echo 100000000d2386db > $GADGET_PATH/strings/0x409/serialnumber
 echo "Pine64" > $GADGET_PATH/strings/0x409/manufacturer
 echo "PineCube Webcam" > $GADGET_PATH/strings/0x409/product
 mkdir $GADGET_PATH/configs/c.1
 mkdir $GADGET_PATH/configs/c.1/strings/0x409
 echo 500 > $GADGET_PATH/configs/c.1/MaxPower
 echo "UVC" > $GADGET_PATH/configs/c.1/strings/0x409/configuration

 mkdir $GADGET_PATH/functions/uvc.usb0
 mkdir $GADGET_PATH/functions/acm.usb0
 echo 512 > $GADGET_PATH/functions/uvc.usb0/streaming_maxpacket
 # cat <<EOF $GADGET_PATH/functions/uvc.usb0/control/processing/default/bmControls
 # 0
 # 0
 # EOF

 mkdir -p $GADGET_PATH/functions/uvc.usb0/control/header/h
 ln -s $GADGET_PATH/functions/uvc.usb0/control/header/h $GADGET_PATH/functions/uvc.usb0/control/class/fs/h
 # ln -s $GADGET_PATH/functions/uvc.usb0/control/header/h $GADGET_PATH/functions/uvc.usb0/control/class/hs/h
 # ln -s $GADGET_PATH/functions/uvc.usb0/control/header/h $GADGET_PATH/functions/uvc.usb0/control/class/ss/h

 config_frame () {
     FORMAT=$1
     NAME=$2
   WIDTH=$3
   HEIGHT=$4

     framedir=$GADGET_PATH/functions/uvc.usb0/streaming/$FORMAT/$NAME/${HEIGHT}p

     mkdir -p $framedir

     echo $WIDTH > $framedir/wWidth
     echo $HEIGHT > $framedir/wHeight
     echo 333333 > $framedir/dwDefaultFrameInterval
     echo $(($WIDTH * $HEIGHT * 80)) > $framedir/dwMinBitRate
     echo $(($WIDTH * $HEIGHT * 160)) > $framedir/dwMaxBitRate
     echo $(($WIDTH * $HEIGHT * 2)) > $framedir/dwMaxVideoFrameBufferSize
     cat <<EOF > $framedir/dwFrameInterval
 333333
 400000
 666666
 EOF

 }

 config_frame mjpeg m 640 360
 config_frame mjpeg m 640 480
 config_frame mjpeg m 800 600
 config_frame mjpeg m 1024 768
 config_frame mjpeg m 1280 720
 config_frame mjpeg m 1280 960
 config_frame mjpeg m 1440 1080
 config_frame mjpeg m 1536 864
 config_frame mjpeg m 1600 900
 config_frame mjpeg m 1600 1200
 config_frame mjpeg m 1920 1080

 SMALL_WIDTH=480p

 mkdir -p $GADGET_PATH/functions/uvc.usb0/streaming/uncompressed/u/$SMALL_WIDTH

 echo 640 > $GADGET_PATH/functions/uvc.usb0/streaming/uncompressed/u/$SMALL_WIDTH/wWidth
 echo 480 > $GADGET_PATH/functions/uvc.usb0/streaming/uncompressed/u/$SMALL_WIDTH/wHeight
 echo 333333 > $GADGET_PATH/functions/uvc.usb0/streaming/uncompressed/u/$SMALL_WIDTH/dwDefaultFrameInterval
 echo $((640 * 480 * 80)) > $GADGET_PATH/functions/uvc.usb0/streaming/uncompressed/u/$SMALL_WIDTH/dwMinBitRate
 echo $((640 * 480 * 160)) > $GADGET_PATH/functions/uvc.usb0/streaming/uncompressed/u/$SMALL_WIDTH/dwMaxBitRate
 echo $((640 * 480 * 2)) > $GADGET_PATH/functions/uvc.usb0/streaming/uncompressed/u/$SMALL_WIDTH/dwMaxVideoFrameBufferSize
 cat <<EOF > $GADGET_PATH/functions/uvc.usb0/streaming/uncompressed/u/$SMALL_WIDTH/dwFrameInterval
 333333
 400000
 666666
 EOF

 mkdir $GADGET_PATH/functions/uvc.usb0/streaming/header/h
 cd $GADGET_PATH/functions/uvc.usb0/streaming/header/h
 # ln -s ../../mjpeg/m
 ln -s ../../uncompressed/u
 cd ../../class/fs
 ln -s ../../header/h
 cd ../../class/hs
 ln -s ../../header/h
 cd ../../../../..

 ln -s $GADGET_PATH/functions/uvc.usb0 $GADGET_PATH/configs/c.1/uvc.usb0
 ln -s $GADGET_PATH/functions/acm.usb0 $GADGET_PATH/configs/c.1/acm.usb0
 udevadm settle -t 5 || :
 ls /sys/class/udc > $GADGET_PATH/UDC
If above script goes without issues you should be able to see one more additional `/dev/video*` device.
8. run uvc-gadget
UVC Gadget software links camera of PineCube and UVC gadget (OTG port).
"-v" is for video input device - PineCube Camera, "-u" is for output video device UVC device or OTG port, -x shows FPS.
./uvc-gadget -u /dev/video1 -v /dev/video0 -x
9. Plug the PineCube to your laptop or pc and check if you can see PineCube Webcam.
Known issues:
- Low Frame rate(3FPS~5FPS). That is because:
- At the time of writing this section, `streaming_maxpacket` value cannot be set to max value (2048 bytes.) It can be set only to 512 bytes. If `streaming_maxpacket` is set to max (2048) value, UDC cannot be turned on with `Invalid Value` error.
- YUYV (uncompressed) file format is being used to stream the images. Uncompressed images take a lot of USB bandwidth compared to compressed. We can stream more frames, if MJPEG or even H254 (compressed images) would be used. I will be investigating further on how to stream more frames through USB port.

