PinePhone Installation Instructions
This section has generic installation instructions. Please see the PinePhone Software Releases section for specific installation instructions for each distribution.
Boot priority
The PinePhone always boots from the microSD card first. It is therefore recommended to have a microSD card handy. It is not possible to lock themself out of the phone when the installation on the internal storage (the eMMC) fails, as a correctly flashed microSD card will always boot. Note: Booting from USB is not supported by the hardware, a live USB stick will not boot.
The phone will also try to boot from microSD cards, which were previously flashed with an OS and formatted later, causing the phone to fail to boot. See reuse SD card on how to format the microSD card properly, including wiping the residues of u-boot.
Installation to the microSD
To install an image to the microSD card:
- Download your chosen image from PinePhone Software Releases
- Extract the compressed file
- Write the image to your microSD card, see below
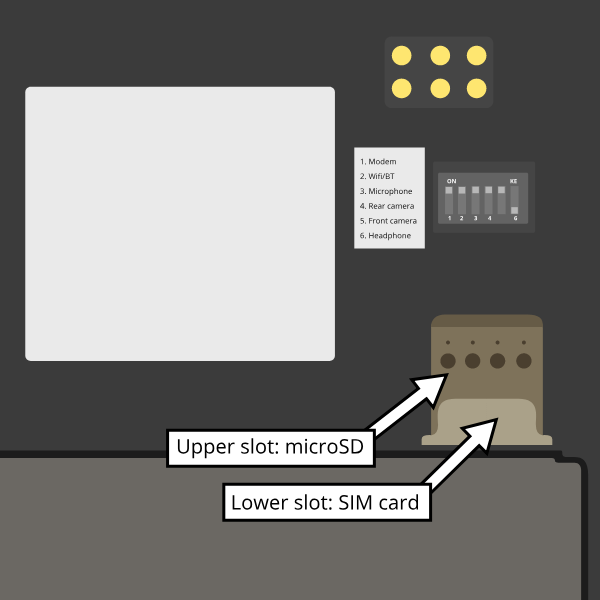
- Plug microSD card into phone (make sure to use the top slot. NOT the bottom one)
- Boot phone
If you need step-by-step instructions for writing an image to an microSD card, check the NOOB guide, then return to this page.
Flashing the microSD
Using dd
Make sure to select the correct device using lsblk. Then run dd with the correct device:
sudo dd if=pine.img of=/dev/[DEVICE] bs=1M status=progress conv=fsync
Using bmaptool
Make sure to select the correct device using lsblk. Then run bmaptool with the correct device:
Download the .img.xz and the .img.bmap files, then run bmaptool copy --bmap image.bmap image.xz /dev/[DEVICE]. This takes around 2.5 minutes to flash a 4 Gb file.
Using graphical tools
GUI applications such as Etcher and GNOME Disks can be used to flash the MicroSD too.
Installation to the eMMC
Using JumpDrive
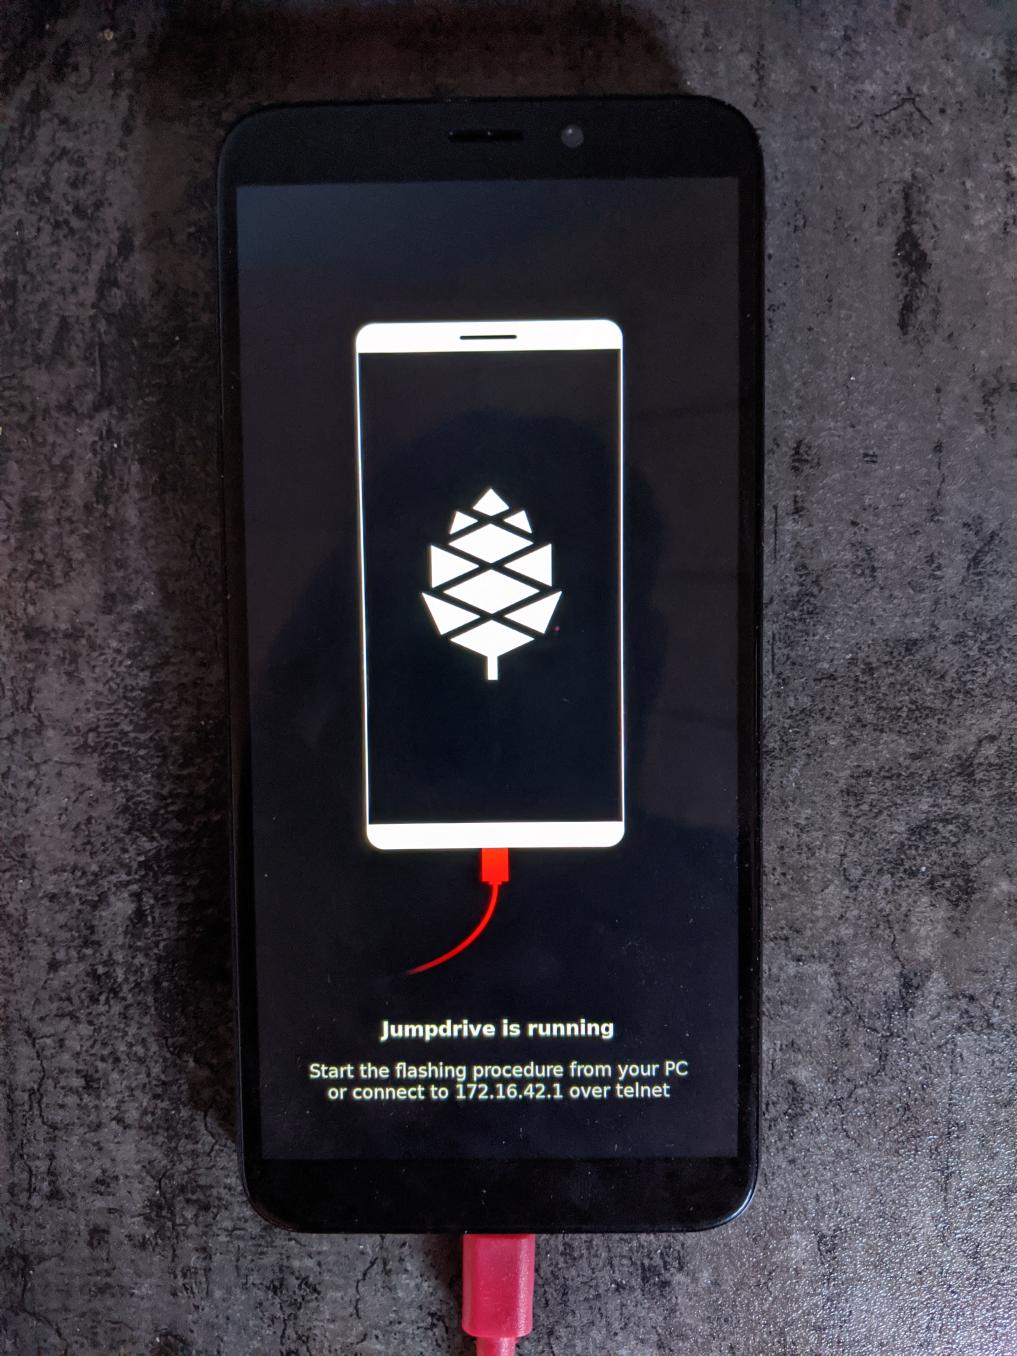
The internal eMMC flash storage can be flashed using the Jumpdrive utility by Danct12 and Martijn from postmarketOS. This utility boots from micro SD and exposes the internal eMMC flash storage when the PinePhone is connected to a computer. The process of flashing an OS to the exposed and mounted eMMC is identical to that of any other storage medium - e.g. a microSD card. You can use the dd command or a utility such as Etcher or Gnome Disks, etc.
Latest Jumpdrive can be found here.
- Download and extract the Jumpdrive image
- Flash the Jumpdrive image to a microSD card
- Boot the PinePhone from the Jumpdrive microSD card
- Connect the PinePhone to your computer using USB-A -> USB-C cable
- Flash the exposed PinePhone drive (e.g. /dev/mm..., check for the right device in dmesg, GNOME disks, or similar, and make sure it's unmounted) with your chosen OS image
- Once the flashing process is complete, disconnect the PinePhone from your PC, power it down and remove the Jumpdrive microSD card
- The process is now finished, and you can boot from eMMC
The Jumpdrive image is smaller than 50MB. You can keep an microSD card specifically for using Jumpdrive, and there are 64MB microSD cards sold cheaply that will suffice. Jumpdrive also acts as a rescue image in case if you messed up your installation. To do so, you can telnet to 172.16.42.1, mount rootfs and fix it!
From the booted microSD OS
- Flash an OS to the microSD card (and optionally resize the partition, see below)
- Insert microSD card and boot the phone
- Download the desired OS' image on the booted OS or transfer it to the microSD card
- Extract the image file if it is archived
- Flash the image file to eMMC using
dd if=new-pinephone-image.img of=/dev/mmcblkX bs=1M status=progress conv=fsyncwhere X is the number label of the eMMC (of the disk, not the partition!). Use the command lsblk to check your devices: typically with the current kernel the microSD card is /dev/mmcblk0 and the eMMC is /dev/mmcblk2 but as always with dd be extremely cautious to get the devices correct. - Turn off phone, remove microSD card and then turn on the phone.
From the booted microSD OS (risky)
- Prepare a new microSD card, flash desired OS to the microSD card
- Boot the phone with your new microSD card image
- Within the booted OS, flash/clone the running OS to eMMC, e.g. using dd. It will take about 15 minutes (depending on the speed of your card), and in the end it may show an error about not enough space - just ignore it.
- Turn off phone, take out microSD card, and try booting the phone which should load up the new OS from eMMC.
- Open terminal and resize partition to fill up entire disk (see below).
SD to eMMC via installer
postmarketOS installer images booted from microSD card will simply ask the user, if they want to install to eMMC. The feature lives in the distro-agnostic calamares-extensions repository (see calamares-extensions#7), so other distributions might adopt this in the future.
Resize partition to fit disk space
Once you've flashed the OS to your microSD card or eMMC storage, you may also need to expand the partition to fill all the available space.
Resize SD card's partition using computer
For microSD cards, insert the microSD card and resize the partitions through the computer. For eMMC, insert the phone cable and use Jumpdrive to access the eMMC directly, and resize the partition after flashing the image. To do the flashing you have two options:
Using Growpart
Install growpart and run:
growpart /dev/mmcblkX Y
resize2fs /dev/mmcblkXpY
where X is the storage device and Y is the partition number (viewable from lsblk).
If you get any errors about missing or unknown commands, use apt-cache search to find and install the needed software. Also don't forget to use sudo.
Using Parted
Parted's interactive mode and resize work well together. Do this before you put your microSD card into the PinePhone for the first time for best results.
sudo parted /dev/<your_sd_card_device>
(parted) resizepart 2 100%
(parted) quit
sudo resize2fs /dev/<the_second_sd_card_PARTITION>
Resize from within PinePhone
eMMC: you would need to resize the partition on eMMC (flashed with the operating system) by booting another image from the microSD card: that way, the eMMC will be unmounted. It is not recommended to resize eMMC while booted from eMMC! Resizing a currently mounted partition can have weird results. If you booted from the microSD card, you can follow the above guidelines on how to resize from a computer.
MicroSD card: It is generally not possible to boot from eMMC to partition the unmounted microSD card, because of the boot order - you would have to write the image to the empty microSD card first, then resize partition, all without rebooting. It is also not recommended to resize the microSD card while booted from microSD card! Resizing a currently mounted partition can have weird results.
Reuse SD card for data storage on system booting from eMMC
Once you have installed your release of choice to eMMC, you may wish to use an microSD card for data storage. If you choose to re-use a card you have previously used to boot from, you will find your phone will not boot if you just reformat the card and insert it. This is because the Allwinner firmware in the PinePhone uses some (normally) unused space at the front of the microSD card to store boot software, which you need to clear.
This can be done as follows on any linux system:
lsblk
to check the device of your microSD card – as an example lets assume it is /dev/mmcblk0 then
sudo dd if=/dev/zero of=/dev/<your_sd_card_device> bs=8k seek=1 count=4
will clear the relevant sectors of your card.

