Wifi Remote I2c
Quick Start Guide
Hardware Setup
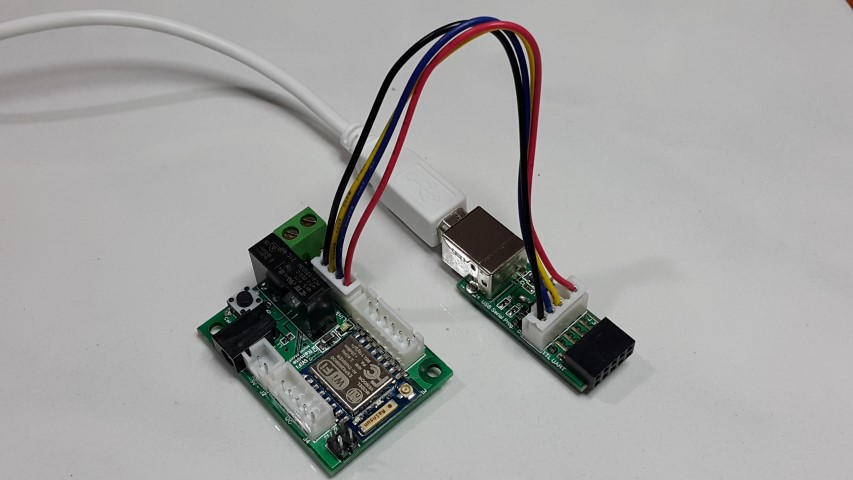
- Make sure that the driver for USB/UART Programming/Console Adapter (PMPROG01) is properly install and the PC is detected it as Comm Port.
- The USB/UART Bridge is base on Silicon Lab CP2012 chipset.
- USB/UART Programming/Console Adapter (PMPROG01) driver can be Download here
- Connect the USB/UART Programming/Console Adapter (PMPROG01) to the Wifi Remote I2c Device.
Setting Configuration
- For windows system, you can use terminal emulator program Termite to configure the device.
- Termite can be downloaded at http://www.compuphase.com/software_termite.htm
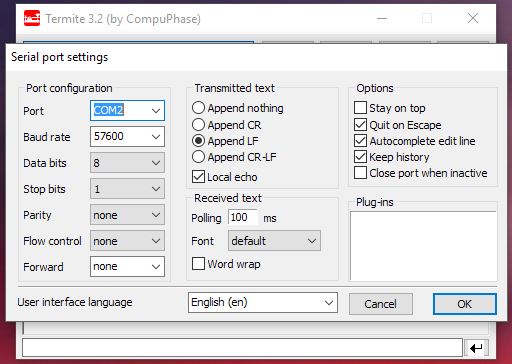
- Make sure the 'Port' setting is refer to the USB/UART Programming/Console Adapter (PMPROG01)'s Comm Port.
- Follow the setting according to the setup screen capture. (57600Baud 8-N-1)
- Once Termite configuration is done, press 'OK' to save the setting.
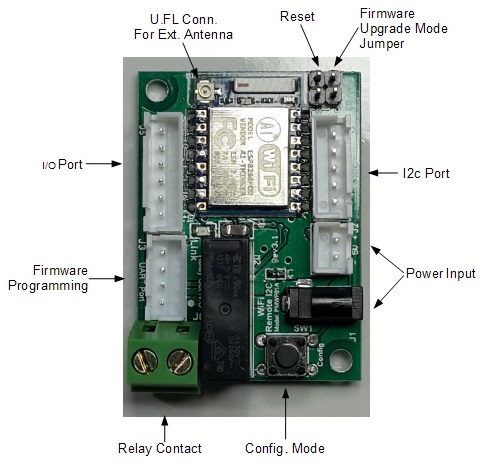
- On the Wifi Remote I2c Device, Press the configuration button to allow the device to go into configuration mode.
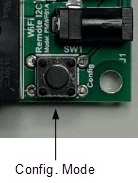 Press Config Mode button to go into configuration mode
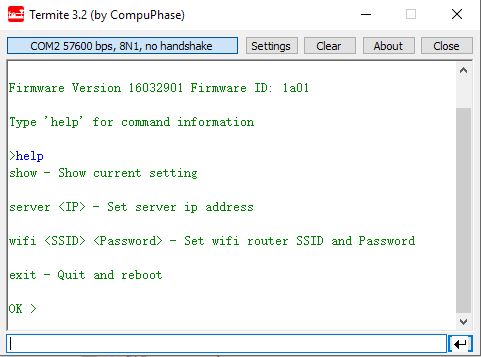
- Type 'help' to show the command available for configuration.
- Type 'show' to list out current configuration.
- To Set the PineA64 IP address in to the device, enter (we will be using IP address 192.168.0.230 as example)
server 192.168.0.230
- To configure the Wifi AP SSID and Password, (eg SSID=TestingWifi and Password=12345 )
wifi TestingWifi 12345
- The SSID and password are case sensitive. Please make sure it is input correctly.
- Once configuration is done, type 'exit' to exit configuration mode and allow the device to reboot.
- After reboot, the Red LED indicator will be blinking fast. Once connected to the WiFi Access Point, the LED indicator will go into slow blink.
- The hardware configuration is done.
