Difference between revisions of "Pinecil"
m (→Pictures) |
m (→Pinecil tips) |
||
| Line 119: | Line 119: | ||
* Miniware long tip 8.0 ohm, new | * Miniware long tip 8.0 ohm, new | ||
* no brand long tip 8.3 ohm, lightly used | * no brand long tip 8.3 ohm, lightly used | ||
[[File:TipResistance.jpg| | [[File:TipResistance.jpg|200px]] | ||
The shorter tip is designed for higher performance. For example with a PD65W-20V charger, the max watt with an 8ohm tip is 50W, and the max watt with a 6.2 ohm tip is ~64 watts. | The shorter tip is designed for higher performance. For example with a PD65W-20V charger, the max watt with an 8ohm tip is 50W, and the max watt with a 6.2 ohm tip is ~64 watts. | ||
Revision as of 05:54, 11 August 2022
The Pinecil is a portable, temperature controlled soldering iron. It also has the intended use of being a Risc-V development device using a breakout board.
Description
The Pinecil's main features are:
- Portability
- Settable temperature
- Soldering tips:
- Replaceable
- More than half a dozen available. Currently sold as 2 separate sets of 4, one fine set, the other larger.
- Compatible with TS100
- Flexible power sources:
- DC 5525 Barrel jack
- USB Type C power delivery
- Battery: 3S/4S/5S LiPo batteries or 18V-20V Lithium-ion tool batteries
- Pinecil V1 has the GD32V Development platform
- Board schematics are open. Software is open. Create your own!
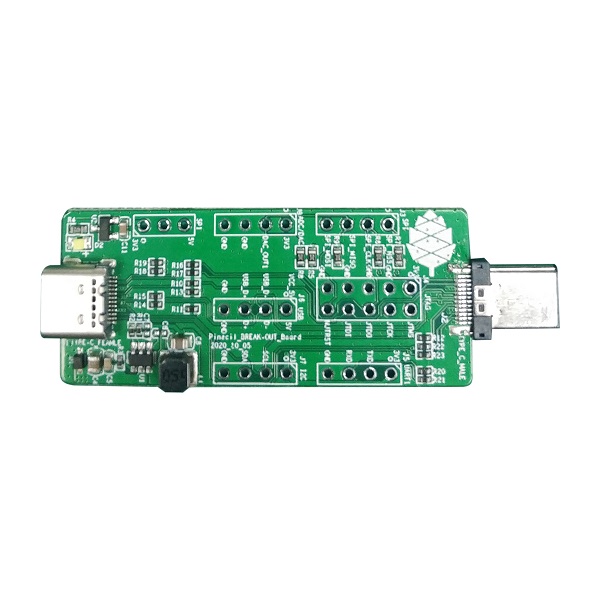
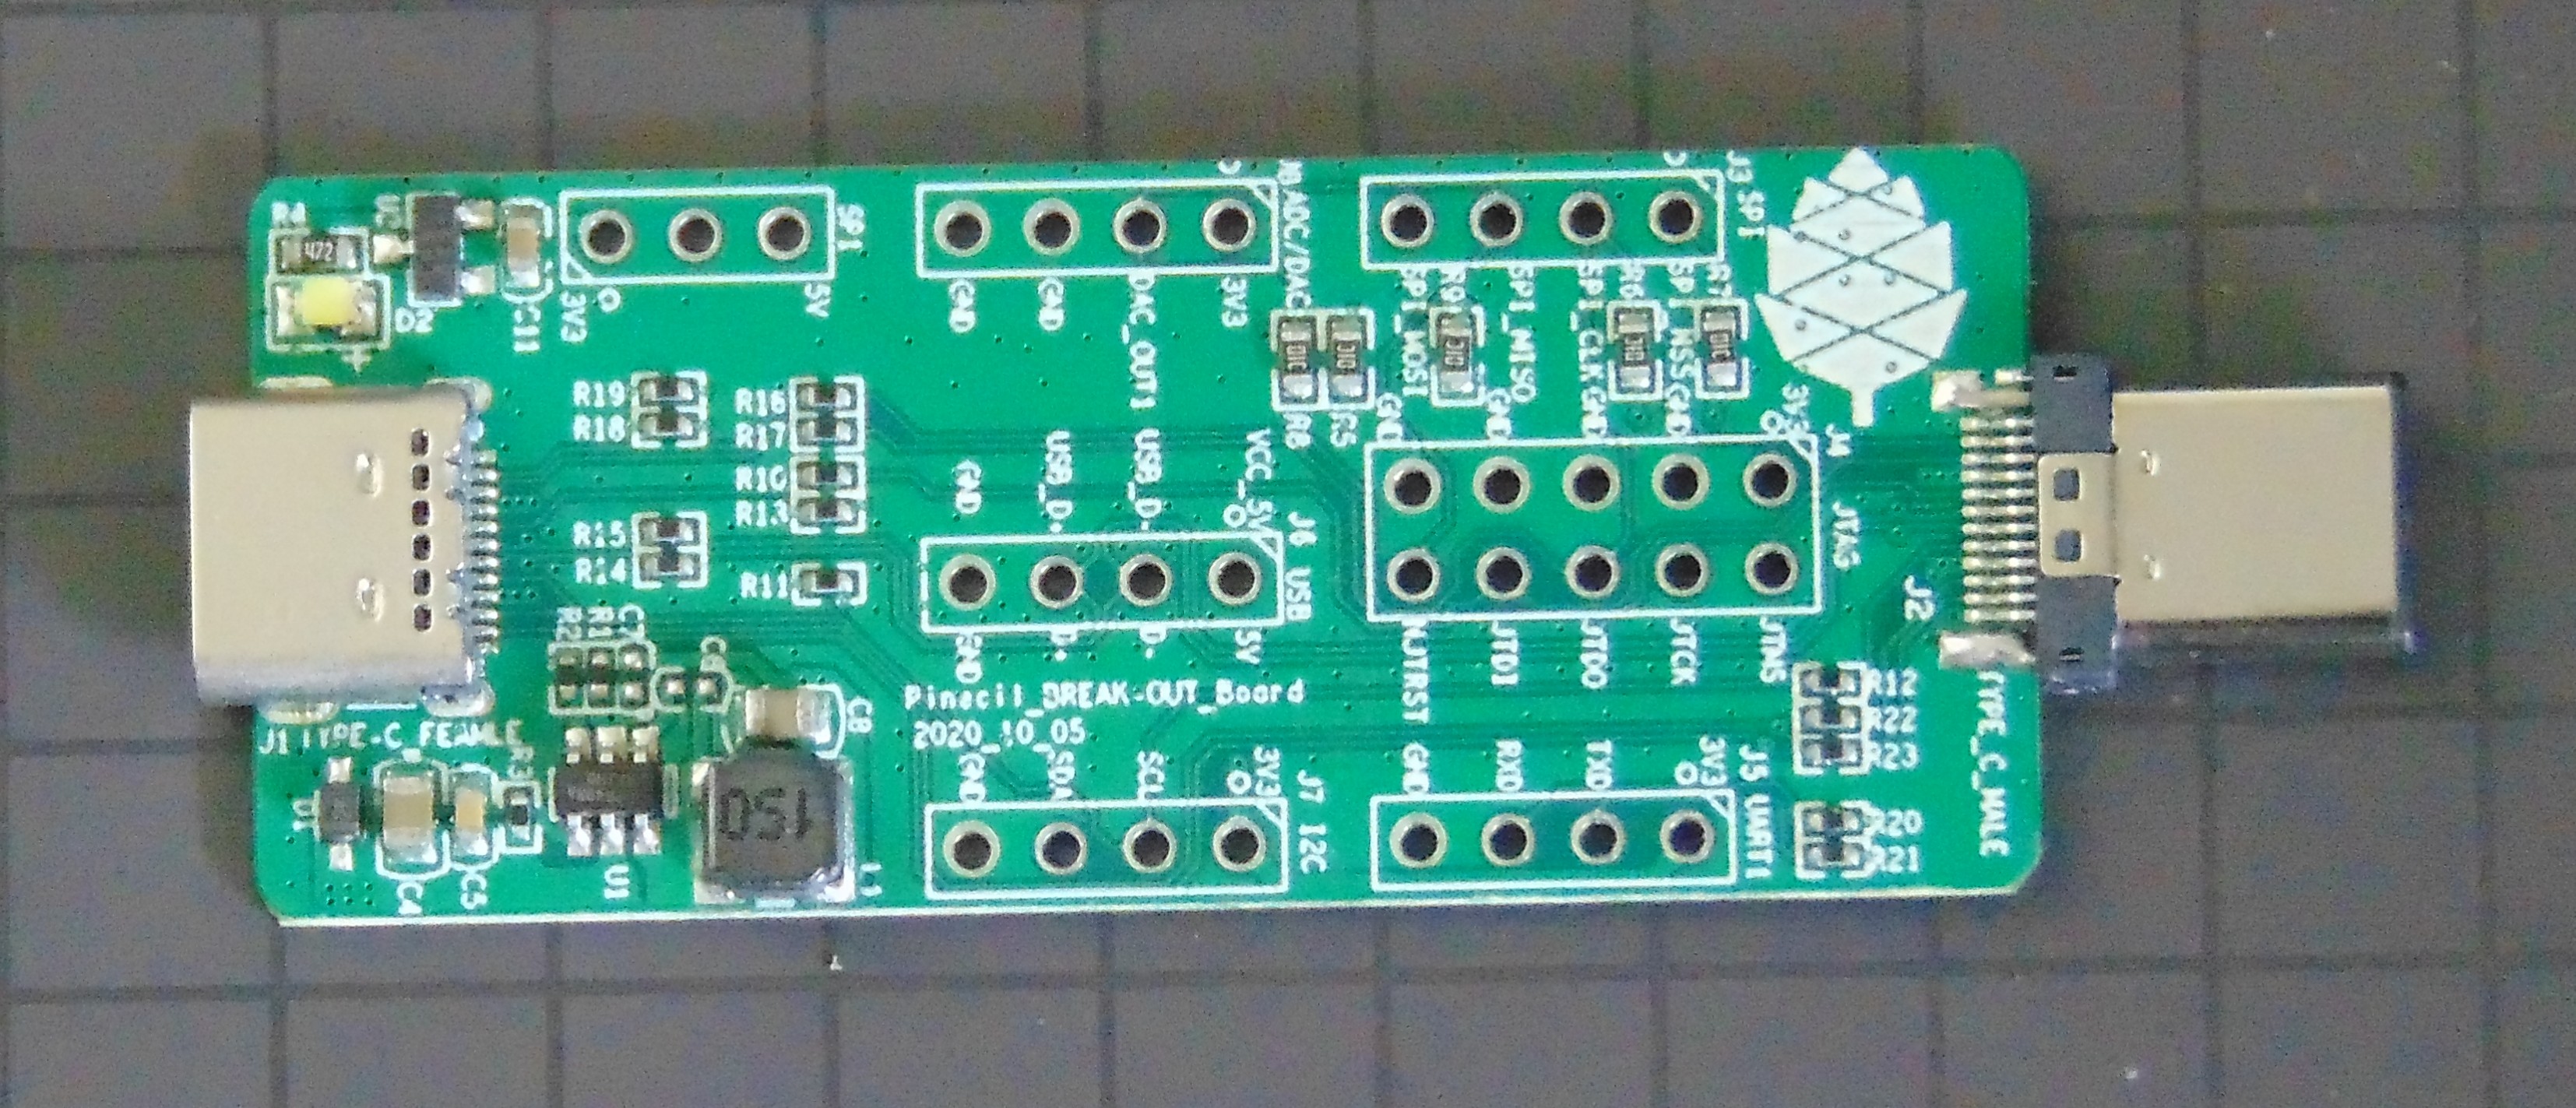
- Pinecil breakout boardlets you use JTAG, GPIO, A2D, SPI, and more.
- Pinecil V2 released Aug 2, 2022 has a BL706 chip, see batch changes below.
There are additional features that include (Useful for devkit use):
- A Programmable Gigadevice Risc-V GD32VF103 embedded processor
- 0.67" Monochrome Display that can render text or graphics
- Support for Idle detection, for automatic power down of tip
- Programmable with tools from Gigadevice, HomeBrew or Linux RISC-V.
Usage
Pinecil comes with a separate heating element / tip. After inserting its barrel into the end of the handle, lightly tighten the screw onto it. Loosen this screw when changing out the tip.
The USB-C port, connected to any host, provides enough power to drive the user interface, but not necessarily enough to heat the tip. 5 volts from a USB2 port will only display the user interface.
To check the firmware version, hold down the "-" button. It will display something like "v2.14.2425902 17-01-21", suggesting its actual release date, here 2021-01-17. Clicking the "+" button repeatedly reveals various internal settings, such as hardware version, current temperature, time since power-on, and number of motions detected. Clicking "-" returns to the regular display of current temperature, target temperature, and supply voltage. At other times it may show power draw.
To heat up the tip, you need a power supply that can provide 12V or more. This may be a dedicated power supply with a standard DC 5525 barrel connector (+ center, - outside) that supplies anywhere from 12V to 21V, or a USB-C supply that can negotiate up to such a voltage. (You probably have a suitable supply disused in a box somewhere. Most Android chargers since about 2015 should work.)
Clicking "+" starts the tip heating. The display then shows power draw, current temperature, supply voltage, and estimated time to reach target temperature. You can adjust the target temperature with further clicks of "+" and "-" buttons. Waiting for the regular display to return, then holding down "-" for a moment turns the heat off. You can watch the temperature measurement go up and down. Certain settings involve holding down both buttons.
The iron will "sleep", switching to a lower temperature, after it has been put down for a short time, and heat up again when it is picked up.
Clicking "-" when heat is off steps through menus to control a variety of settings, such as the sleep temperature, time until sleep, motion sensitivity, temperature units (C or F) etc.
Menu Items (accurate for firmware 2.16)
More detailed and updated list of menu/settings is kept in Github/IronOS documentation folder
- Power settings
- Power source (cutoff choices for voltage and battery operation)
- QC voltage (voltage to negotiate for with QC chargers (9..22 volts in 0.2V steps, recommended up to 21 volts)
- PD timeout (compatibility setting for some picky QC power supplies, allowing to set a shorter amount of time for PD negotiation in 100ms steps)
- Soldering Settings
- Boost Temperature
- Heat on power up (Auto Start)
- Temperature Change (short click)
- Temperature Change (long click)
- Allow locking buttons (when soldering)
- Sleep mode
- Motion Sensor Sensitivity
- Sleep Temperature
- Sleep Timeout
- Shutdown Timeout
- Hall Sensor Sensitivity
- User Interface
- Temperature Units (C/F)
- Display orientation (auto/right/left)
- Cooldown Blink
- Scrolling Speed (slow/fast)
- Reverse +/- buttons
- Animation speed (off/slow/medium/fast)
- Animation loop
- Screen brightness (1..10)
- Screen inversion
- Detailed idle screen
- Detailed solder screen
- Advanced Settings
- Power Limit (watts)
- Factory Reset?
- Calibrate Temperature
- Calibrate Voltage
- Power Pulse (watts)
Pictures
Pre-release:
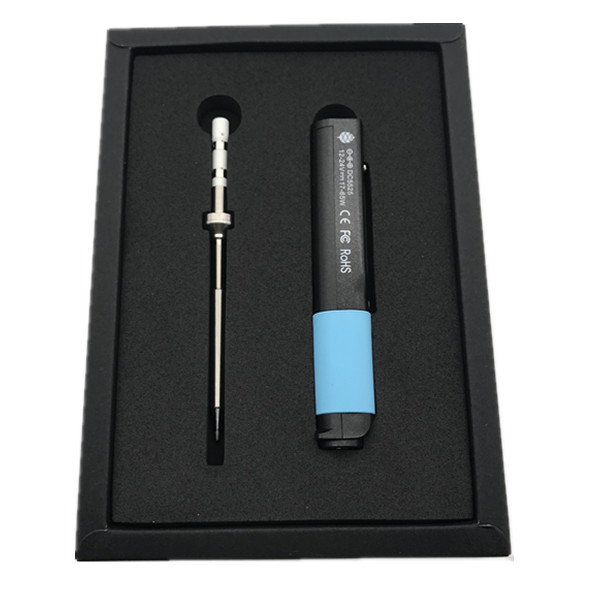
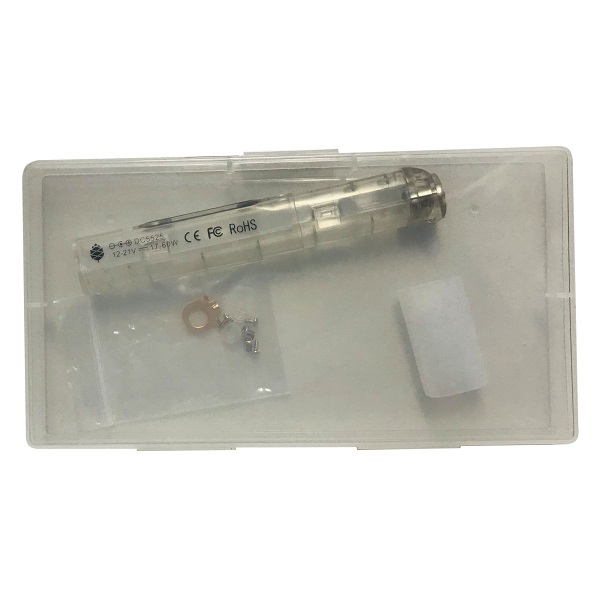
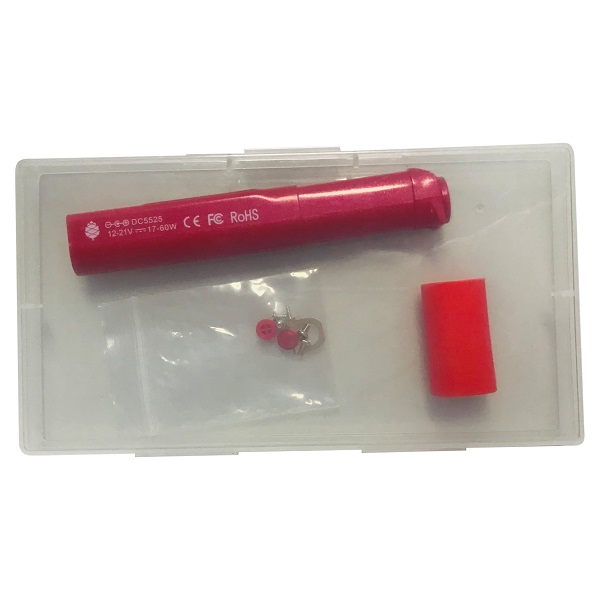
Production:
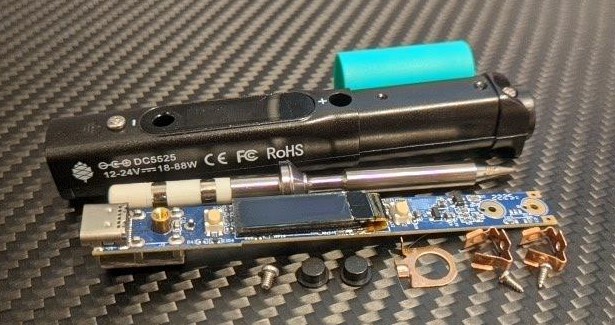
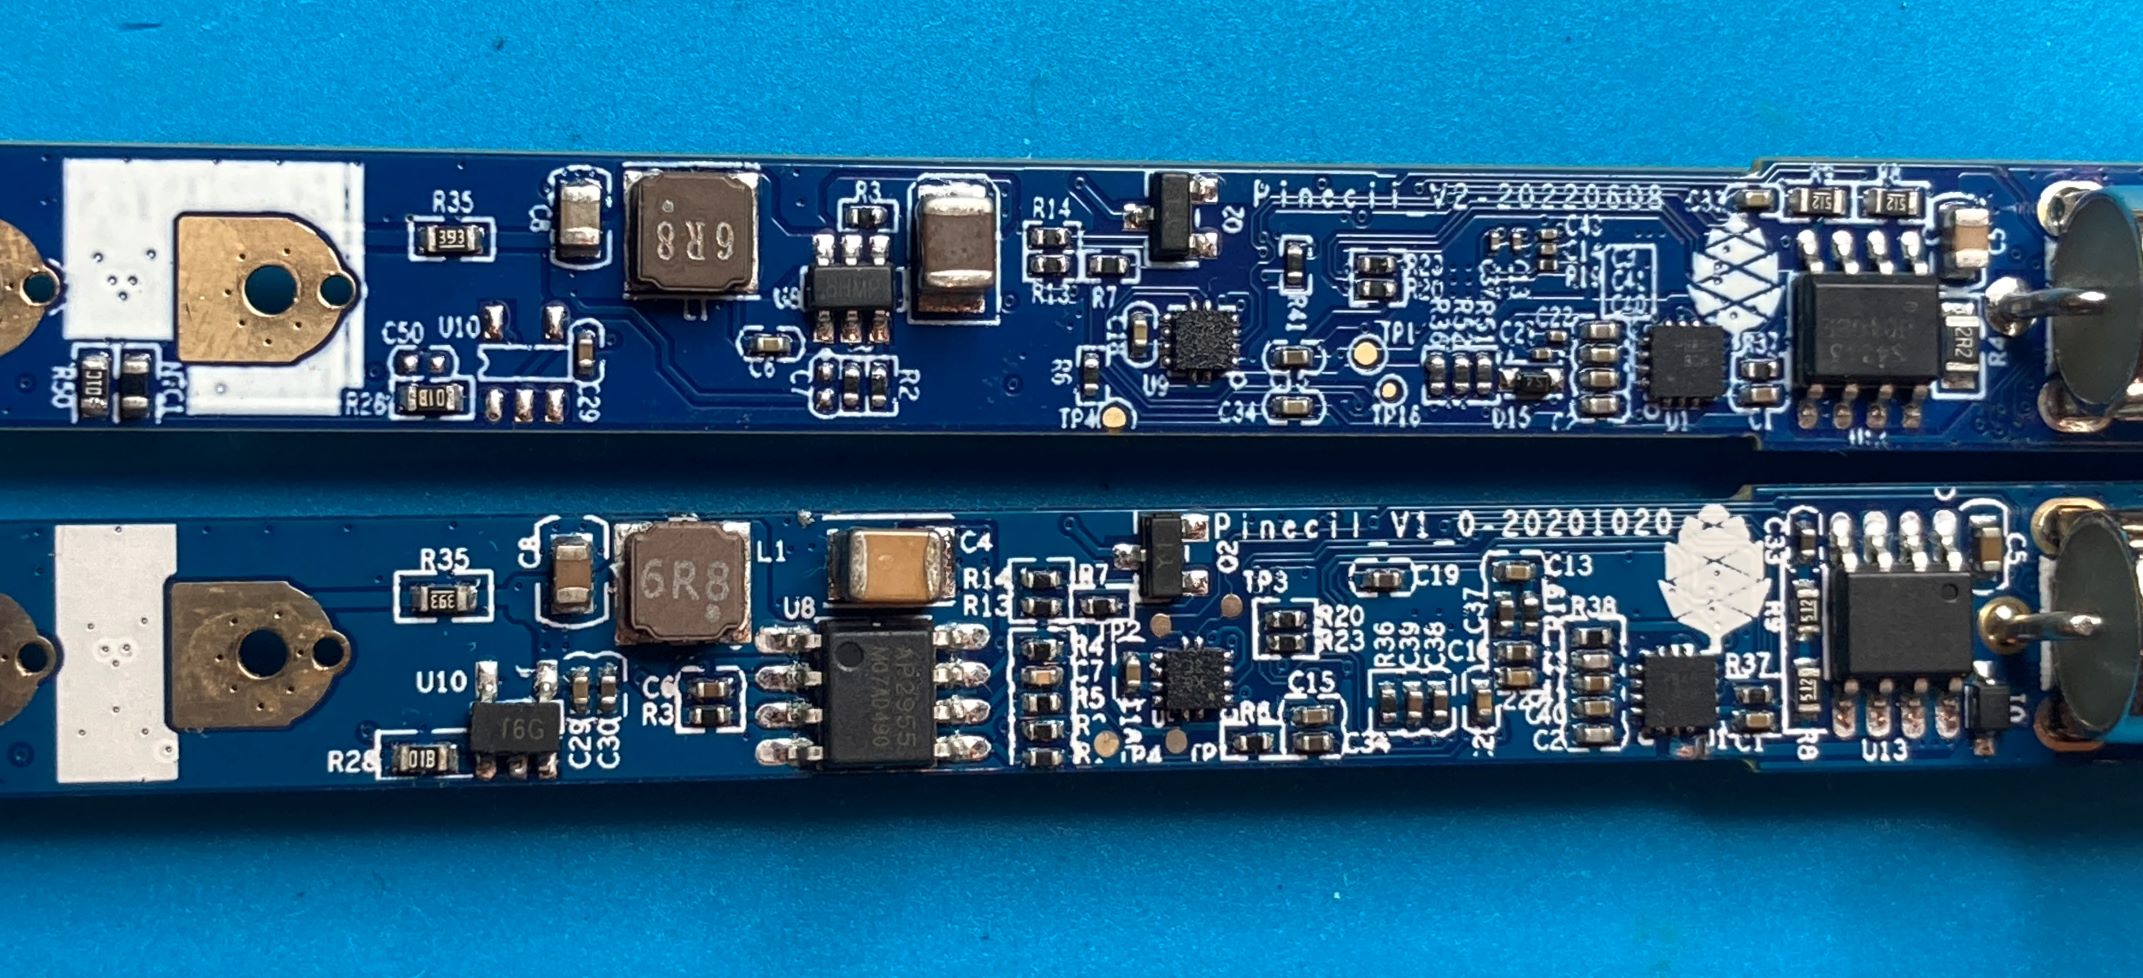
PCB:
Pinecil tips
- Uses TS-100 compatible tips
- Uses Pine64 new design shorter 6.2 ohm tips
- Pinecil V1 includes tip model TS-B2.
- Pinecil V2 includes tip model TS-B2-Short.
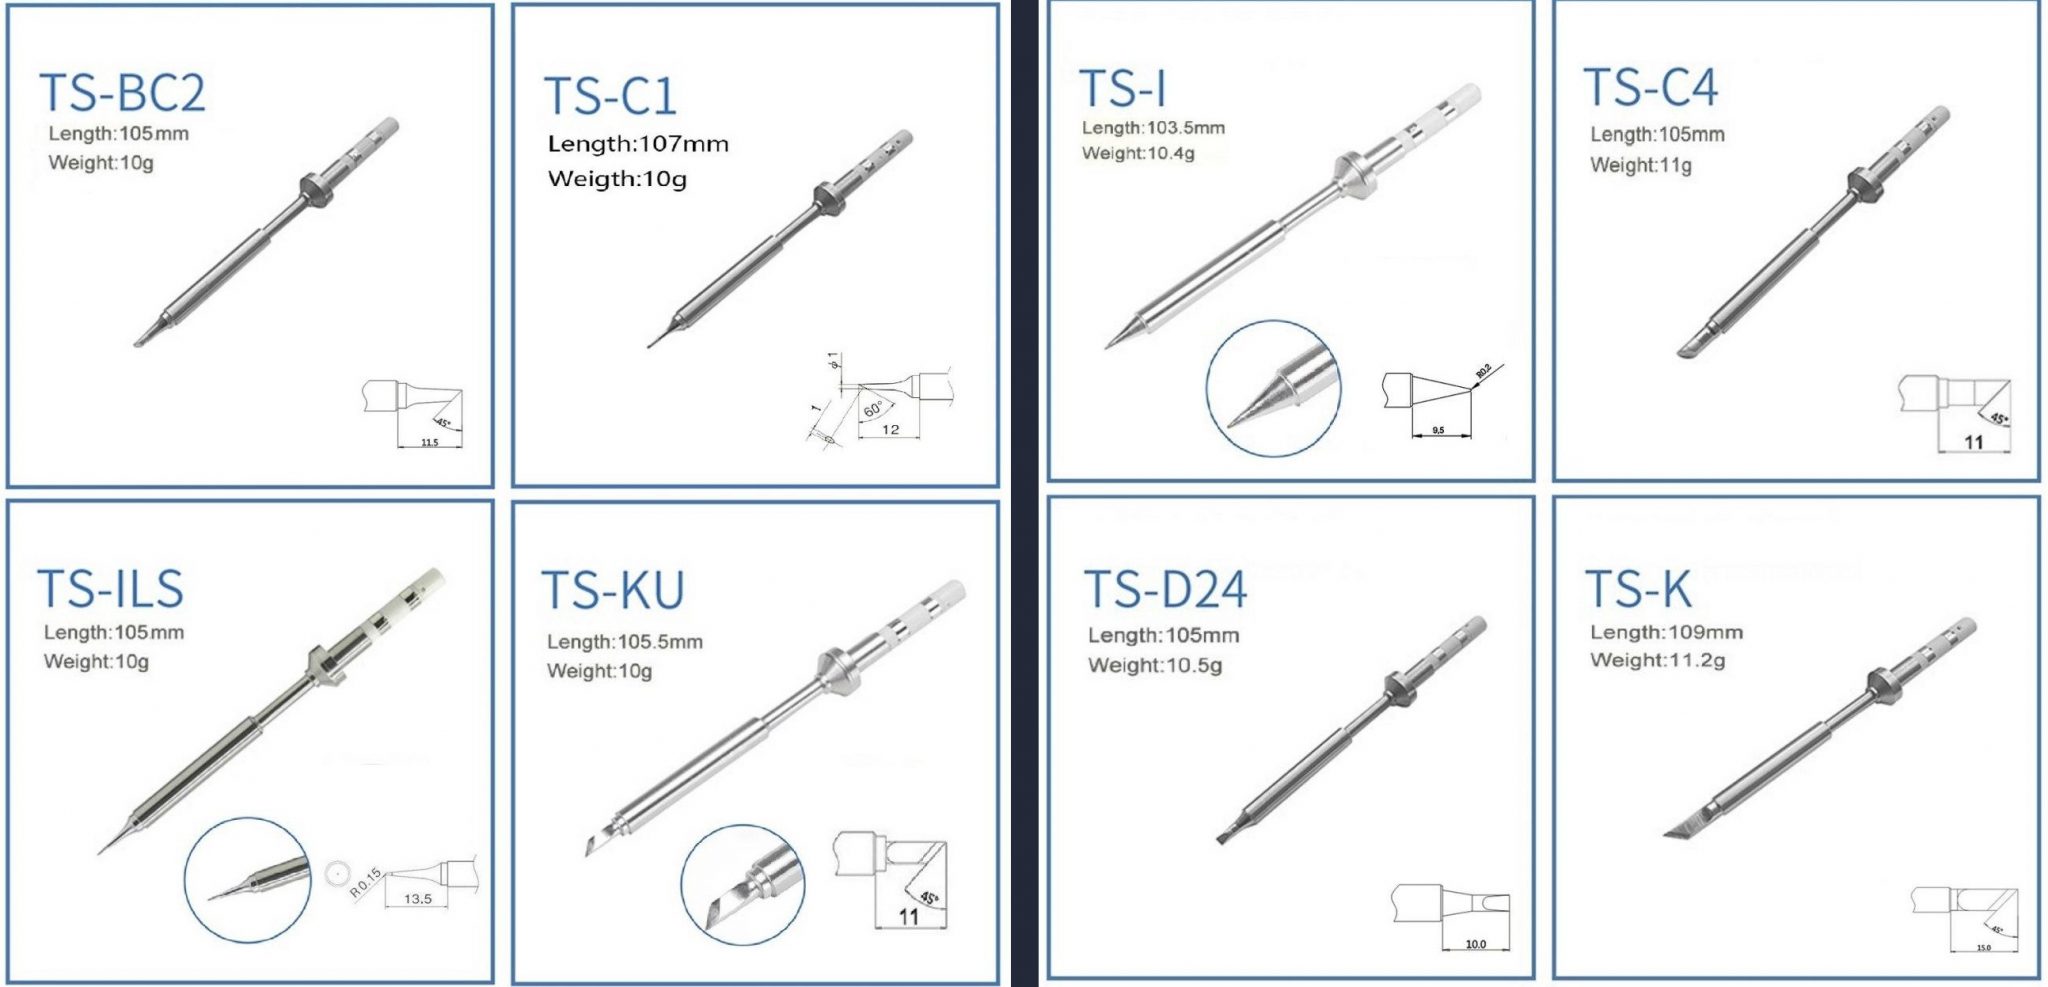
- Fine Tip set 1 (left) & Gross (large) 2 (right):
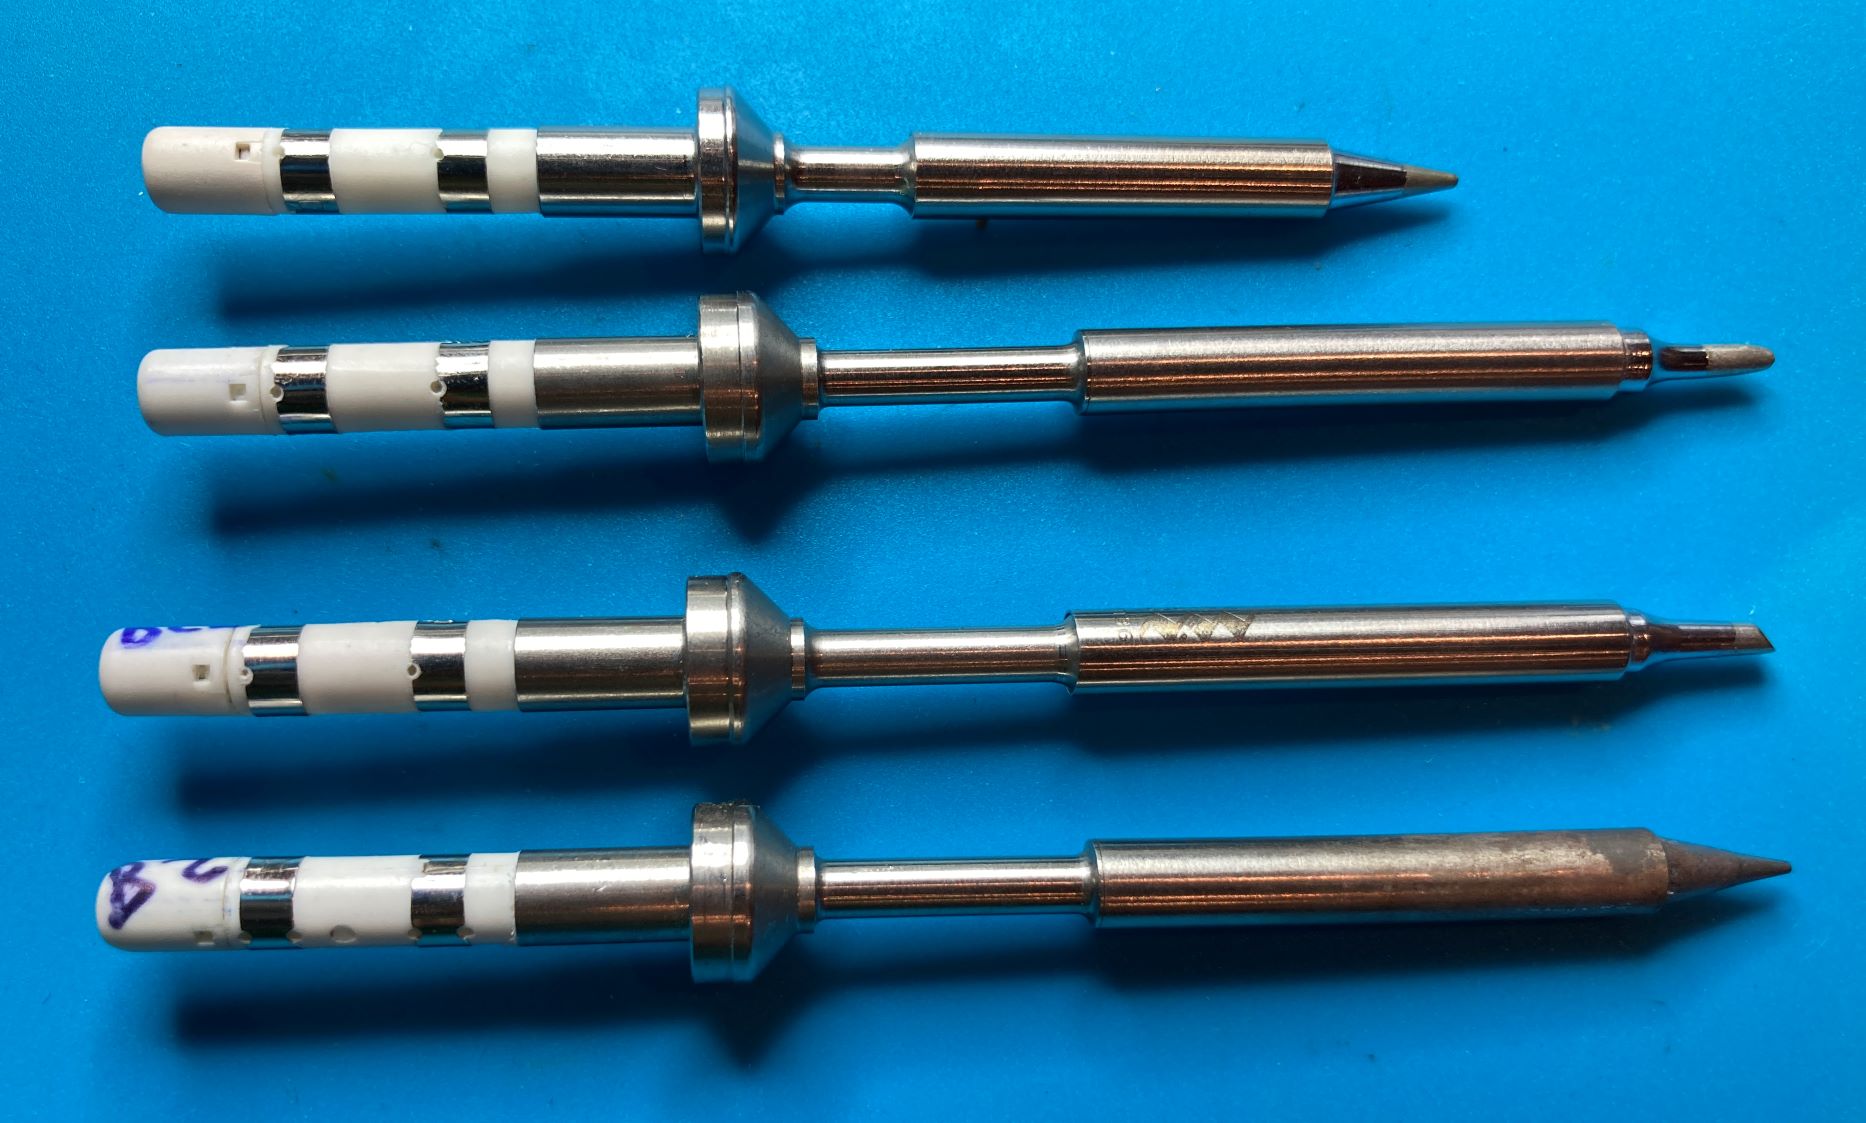
Common resistance for tips, from top to bottom:
- Pine64 short tip 6.2 ohm, new
- no brand long tip 7.9 ohm, new
- Miniware long tip 8.0 ohm, new
- no brand long tip 8.3 ohm, lightly used
The shorter tip is designed for higher performance. For example with a PD65W-20V charger, the max watt with an 8ohm tip is 50W, and the max watt with a 6.2 ohm tip is ~64 watts.
Specifications
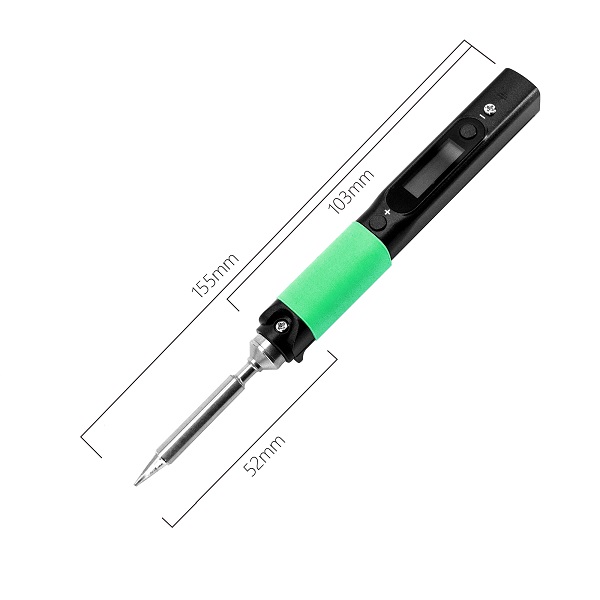
- Dimensions: 170mm with solder tip or 98mm without solder tip x 12.8mm x 16.2mm
- Weight: 30g with solder tip, 20g without solder tip
- CPU: GD32VF103TB 32-bit RV32IMAC RISC-V “Bumblebee Core” @ 108 MHz
- Display: 0.67" QUG 9616TSWCG02 96x16 Monochrome Matrix display
- Memory:
- 128KB Flash
- 32KB SRAM
- Power supply (only use one of the following at a time):
- DC 12V- 21V 5525 Barrel Jack. Trying to use a 5521 (which requires excessive force) will BREAK the connector.
- USB-C 12-20V PD
- QC3.0
- Recommend operating voltage 12-21V, some components can tolerate higher voltages at "absolute maximum" but it's very ill-advised
- Fasteners used(source)
- Originals are Phillips screws: two M2x3mm at the tip, and one M2x4mm is the ground screw behind minus button.
- Alternate screw replacments, M2x4mm Thumb screw can replace the Top side Tip holder screw
Pinecil board information, schematics and certifications
- Pinecil V1 mainboard schematic (V1 was sold pre- Aug 2, 2022):
- Pinecil mainboard schematic ver 1.0 20201120, this is production version schematic
- Pinecil mainboard ver 1.0 PCB Component Placement Top PDF file
- Pinecil mainboard ver 1.0 PCB Component Placement Bottom PDF file
- Pinecil mainboard ver 1.0 PCB Component Placement Top Drawing file
- Pinecil mainboard ver 1.0 PCB Component Placement Bottom Drawing file
- Pinecil certifications:
- Pinecil breakout board schematic:
- Photos:
Manuals
Firmware
The official firmware that comes with the Pinecil is IronOS. If you just want to use your Pinecil as a soldering iron, then keep it updated with IronOS. It's a good idea to check for updates regularly, as development is very active and there may be new bug fixes available.
For firmware update instructions, please visit the update documentation on GitHub.
If you want to see the latest versions, or submit a software feature request, visit the GitHub repository for IronOS, from Ralimtek
Development efforts
| Project Homepage | Firmware Images | Description | |
|---|---|---|---|
| Ralimtek | Ralim/IronOS | https://github.com/Ralim/IronOS/releases/ | Officially endorsed Pinecil firmware |
| Alvin Wong | alvinhochun/gd32vf103-pinecil-demo-rs | Collection of Rust code demos for Pinecil |
Batch changes
- On Aug. 2, 2022, Pinecil V2 was released with improved hardware & accesories. It retains the same ergonomics and design as the original Pinecil, and will work with any accessories you already have including existing cases and tips. It comes with a teal color silicone grip versus the sky blue finger grip from Pinecil V1. It also includes one of Pine64's newly designed shorter 6.2 ohm tips. By reducing the tip resistance from 8 to 6.2 ohms, it allows greater performance and and faster heating (65W @ 20V compared to 8ohm tips which allowed a max of 50W to Pinecil).
- Key changes in V2: new processor (BL706), higher maximum input voltage (24V), tentative support for USB-PD EPR (28V), support for measuring tip resistance, allows automatic detection of 6.2 vs 8 ohm tips. A notable improvement is the new BL706 RISC-V processor from Bouffalo. It is similar to the BL602 in the Pinenut. The BL706 features Bluetooth Low Energy (BLE); so future IronOS firmware releases will work to expose features over BLE. This is not trivial work, but as people contribute to the opensource code of Github/IronOS, the BLE will be expanded.
- Things staying the same in V2: V2 still uses a RISC-V processor, but adds noticeable upgrades to the hardware. GPIO is broken out on USB-C for creating your own projects, same pinout as Pinecil V1, same great feel, including the rubber grip, works with all existing tips, same DC input + USB-C input connections, same case as V1 and compatibility with the clear/black/red cases.
- For the first manufacture batch (October 2020, order number 158xxx) of the Pinecil, the copper ring connecting the earth screw to the tip was omitted as the engineering team found the TS100 design lacking. For the second round onwards, an improved design copper ring has been included as standard, and is also included with the replacement clear and black handles. For normal operation of the iron, omission of the ring does not impact it's operation. If you are working with ESD components, you will however need it in order to ground the iron tip via the earth screw at the back of the iron.
- The first batch of Pinecil's were rated 12-24v @ 65W. After some heated discussion on the discussion group, it was decided that it would be downgraded to 12-21V @ 60W, due to concern over the connection of the DC jack to the USB-PD chip, which has a recommended maximum of 21v, and absolute maximum of 28v.
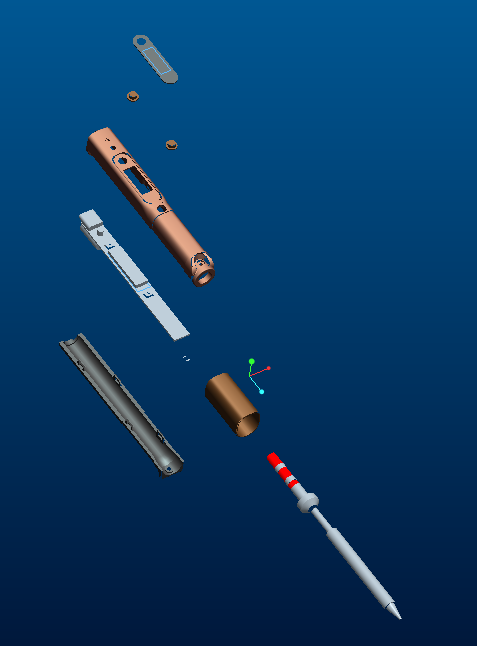
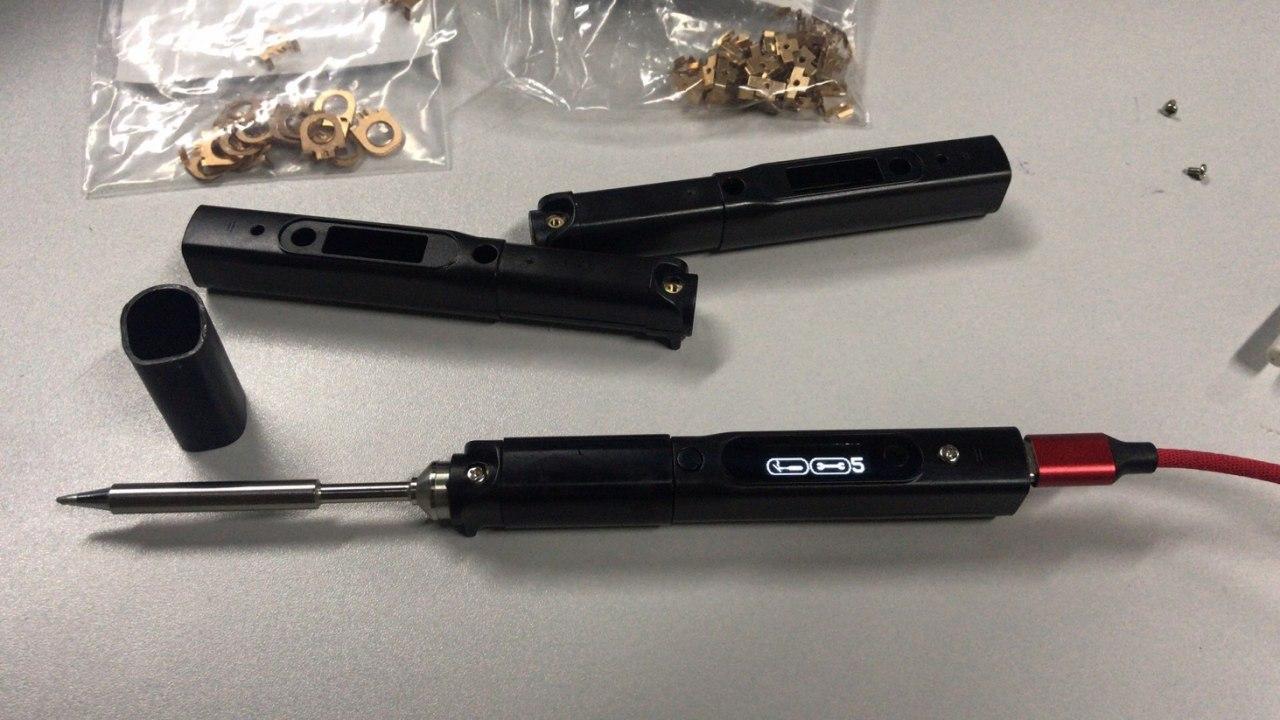
Disassembly steps
- Recommend to take photos to help with reassembly.
- Remove the Tip.
- Let tip cool down.
- Loosen the top tip screw (PH1) (top is display screen side).
- Gently pull the tip out and set aside.
- Slide rubber thumb grip off towards the tip side.
- Remove the bottom screw (at the tip, between the feet) (PH1).
- Remove the ground screw (longer screw on the top side near the (-) button) (PH1).
- Slightly pull the two halves of the case apart at the tip front end, enough to get a fingernail or guitar pick between the halves.
- Move the pick down the length of the split to loosen the bottom half's clips from the top half of the case.
- Once loose, remove the bottom half by moving it forward (it is retained by the top half at the port side).
- Remove the screws retaining the copper tip contacts (PH000, M1.4 x 5), and note the direction.
- Remove the copper tip contacts.
- Flip the Pinecil over and the PCB should fall out, or it could be lifted gently up from the DC barrel end.
- The two small buttons are now loose, carefully set aside the top half, or remove the buttons so they do not get lost.
Video of Alternate Method for opening Pinecil shown here.
Assembly steps
- Place the key caps into their recesses in the top half of the case.
- Place the PCB assembly into the top half of the case ports first.
- Lower the rest of the board into the case and move the PCB assembly towards the port side of the case (the DC barrel connector may be a firm place to gently push).
- Install the copper tip contacts.
- Orient the contact to align the alignment pin with the alignment hole next to the big hole on one of the big gold pads.
- Install and gently tighten the PH000 screw until the clip is no longer loose.
- Place the bottom half of the case into the top half by sliding the lip on the port side (side without the feet) of the bottom half under the arch of the port side of the top half.
- Gently close the case by bringing the two halves together, paying attention to each clip's alignment and ensuring the case edges align.
- Install the short PH1 screw at the bottom of the tip side of the case.
- Install the longer PH1 screw at the ground connection point at the top side of the case (between the display and the ports).
- Slide the rubber sleeve on (larger ridge first).
- Gently insert tip.
- Gently tighten the top PH1 screw to retain the tip.
Power Supply Compatibility
The Pinecil can either work with a 12-21V battery or power supply via the 5525 (5.5mm outer diameter, 2.5mm post) centre-positive jack, or with any USB power supply that supports the QC2, QC3 or USB-PD (Power Delivery) specification. QC2 and most QC3 power supplies will only be able to provide a maximum of 12V, limiting the Pinecil to about 17W of thermal capability. A suitable USB-PD power supply / power bank will be able to provide 20V, allowing the Pinecil to deliver the full 60W of heat to soldering tip.
For certain QC power adapters, there is a limited time for QC negotiation, otherwise voltage will fall back to 5V.
Starting from firmware v2.16, there is a PD timeout setting (in 100ms steps) which allows QC negotiation start earlier.
This enables some QC adapters to work (like some of the Baseus QC chargers) but may result problems with PD negotiation on slower PD adapters.
For certain adapters, a PD timeout value of 15 is needed while most of PD adapters are also work using this value.
Known working QC/PD/barrel power adapters / power banks include:
Power adapter:
- PinePower Desktop PinePower Desktop
- Apple 140W 28V EPR charger with certified EPR Cable
- Nekteck 60W with 6ft cable
- Notebook AC Adapter HP L30757-002 (PD@20V)
- Notebook AC Adapter Lenovo ADLX65YLC3D (PD@20V)
- Notebook AC Adapter Lenovo LN-A0403A3C (Barrel 20V/2A)
- Notebook AC Adapter Delta Electronics ADP-65JH BB (DC@19V) and ADP-90CD DB
- Notebook AC Adapter LITEON PA-1700-02 (DC@18.5V, 65W)
- Smartphone Charger Samsung EP-TA20EWE (QC2@9V)
- Smartphone Charger Google Pixel G1000-US (PD@9V)
- Nintendo Switch AC Adapter (USB-C wall-wart) (PD@15V)
- Notebook Docking Station HP Thunderbolt Dock 230W G2 (PD@20V)
- (had problems with lower firmware versions, but works fine Pinecil firmware: 2.15 and DockingStation firmware: 1.0.69.1)
- Ankosen 65W USB C Charger for Mac Book and Laptop Fast Wall Charger, GaN PD 3.0 Power Adapter Amazon $9.99 (https://www.amazon.com/dp/B08T1P7ZRW)
- Apple 140W USB-C Power Adapter A2452 (PD@20V)
- Amazon Basics 65W One-Port GaN USB-C PD 3.0 (https://www.amazon.com/gp/product/B087MD5MYH)
- Charger Harbor SAIL01 65W Dual USB-C Power Delivery GaN PPS $12.99 (https://www.amazon.com/dp/B097CVQ868)
- Baseus GaN2 Pro Quick Charger 100W (CCGAN100UE) (PD@20V)
Adapters:
- Elecjet AnyWatt SQ, USB-C to Lenovo Square Slim-Tip Adapter 45W or 65W, used with a 65W Lenovo Supply (PD@20V, Pinecil shows 64W)
Power bank:
- Blitzwolf BW-P1 10400mAh QC2
- Insignia 80W 26,800mAh NS-PWLB80
- Baseus BiPow 10000mAh 18W PD&QC3.0
- Intenso 7332330 Powerbank PD 10000 - External Battery PowerDelivery & QuickCharge3 - 10000mAh Powerbank, the Pinecil shows 12V and about 17W when heating up, using USB C PD (Red Silicone Pinecil cable)
- Marbero M87 30W PD 3.0
- Charmast C2032 65W Power Bank, maximum power at 20V is only available from the IN/OUT usb C port, the OUT usb C port delivers only 12V.
Limited usability:
- Nillkin 63W USB Car Charger Quick Charge 3.0 PD (Pinecil Firmware: 2.14.2425902)
- QC3@9V/12V and PD@15V work, PD@20V doesn't
- PD@20V works fine when using PDC004-20V or ZY12PDN on dc jack (DC@20V, limit: 45W)
Not compatible:
- Smartphone Charger RAVpower 30W Dual USB Turbo Wall Charger (Should provide QC3@9V/12V, but only provides 5 V on both ports)
- Sabrent HB-B7C3 USB3 hub, 7 data ports, 3 charge ports, 60W supply -- does not negotiate higher voltages.
Cases and 3D Models
- 3D model of Pinecil by kohkoh
- Pinecil compact case
- Pinecil and tips case
- T12 Tip Adapter
- Thingiverse search for 'Pinecil'
- Multipart Pinecil Case by Pjotrke
Caring for a soldering iron & guides
- Basic soldering guide: https://www.techspray.com/ultimate-guide-to-electronic-soldering
- Caring for the iron: https://www.weller-tools.com/how-to-care-for-soldering-iron-tips/
- Caring for the iron tips: https://www.eevblog.com/forum/beginners/best-way-to-clean-oxidized-soldering-iron-tip/
- Does quality matter?: https://www.youtube.com/watch?v=5Ku7I3hA3AA%7C
- When to use Flux: https://www.youtube.com/watch?v=tfIwHuGzUEk
- How to Solder SMD: https://www.youtube.com/watch?v=EW9Y8rDm4kE
- Fine SMD Soldering: https://www.youtube.com/watch?v=6PB0u8irn-4
- Solder Melt points: https://tinyurl.com/2p8jdxyz
Checklist
Upon receipt, or buying a used Pinecil, one may want to check the following:
- the display turns on when 5-21V is supplied
- via USB type C or 5525 center positive barrel
- it gets 20V from a 20V capable USB PD charger
- check both orientations of the type C connector
- in update mode, it shows up on a computer as a GD32 DFU bootloader (or longan nano)
- this requires a data capable USB cable
- to enter update mode, press
-(button near back/ground screw) while powering on
- both buttons work
-to enter menu or decrease temperature, long press to get software version info or to turn off heating+to turn on heating or select a menu item
- the displayed text rotates according to gravity when orientation is set to Automatic
- menu -> User interface -> Display orientation -> Automatic
- all 3 external screws are present
- one near the back near the screen (ground screw)
- one at the front on top (to hold the tip in)
- one at the front on the bottom (to hold the case together)
- the tip is clean (uniformly silver at the front, with no pitting or texture)
- see #Caring for a soldering iron in case it is used
- it heats up an installed tip, and stops increasing when it reaches the set point
- this may draw up to ~3A, make sure the supply can provide that
- minor overshoot may occur, but, disconnect power if the temperature keeps going up
- the reported temperature is correct
- if no direct measurement is possible, set it to ~230°C and see if it melts SAC (lead-free) solder (~190°C for leaded)
- if there are multiple tips, check all of them
Datasheets for components and peripherals
- GigaDevice RISC-V SoC information:
- Display Module information:
- USB Type-C PD Controller information:
- Sensor information:
- Power Regulator information:
- Power MOSFET Switch information:
- OP Amp information:
