Difference between revisions of "User:Earboxer/Shim U101"
Jump to navigation
Jump to search
| Line 1: | Line 1: | ||
[[User:Earboxer/Deframe_PinePhone First, remove the frame]] | [[User:Earboxer/Deframe_PinePhone First, remove the frame]] | ||
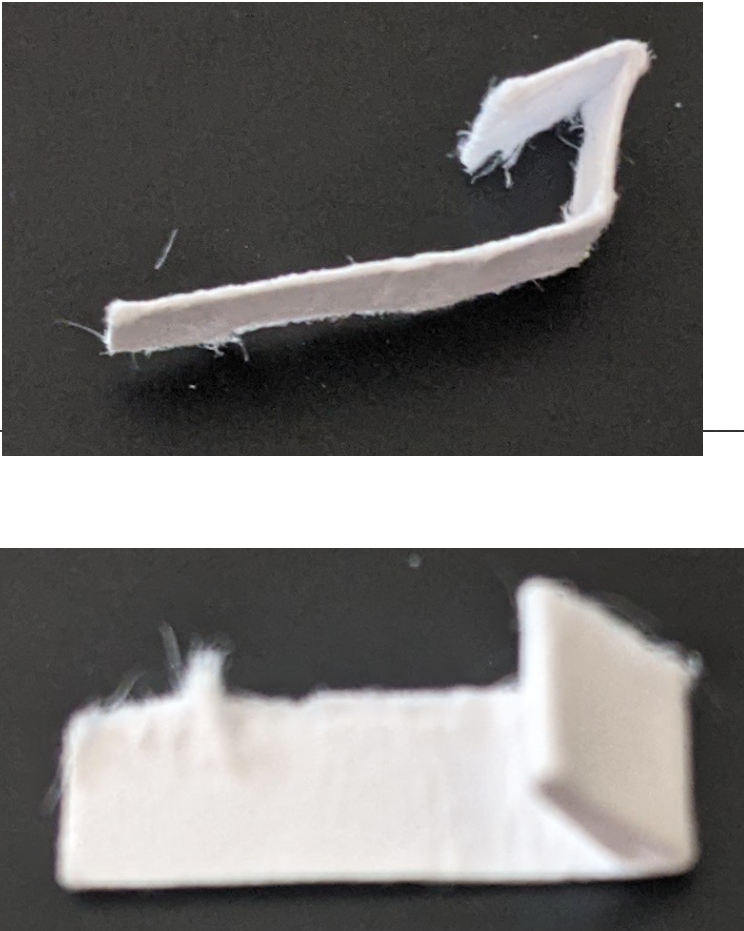
Fold a small | Fold a small strip of cardstock three times over, leaving a tail | ||
[[File:PinePhone-U101-shim-creation.jpg|300px]] | |||
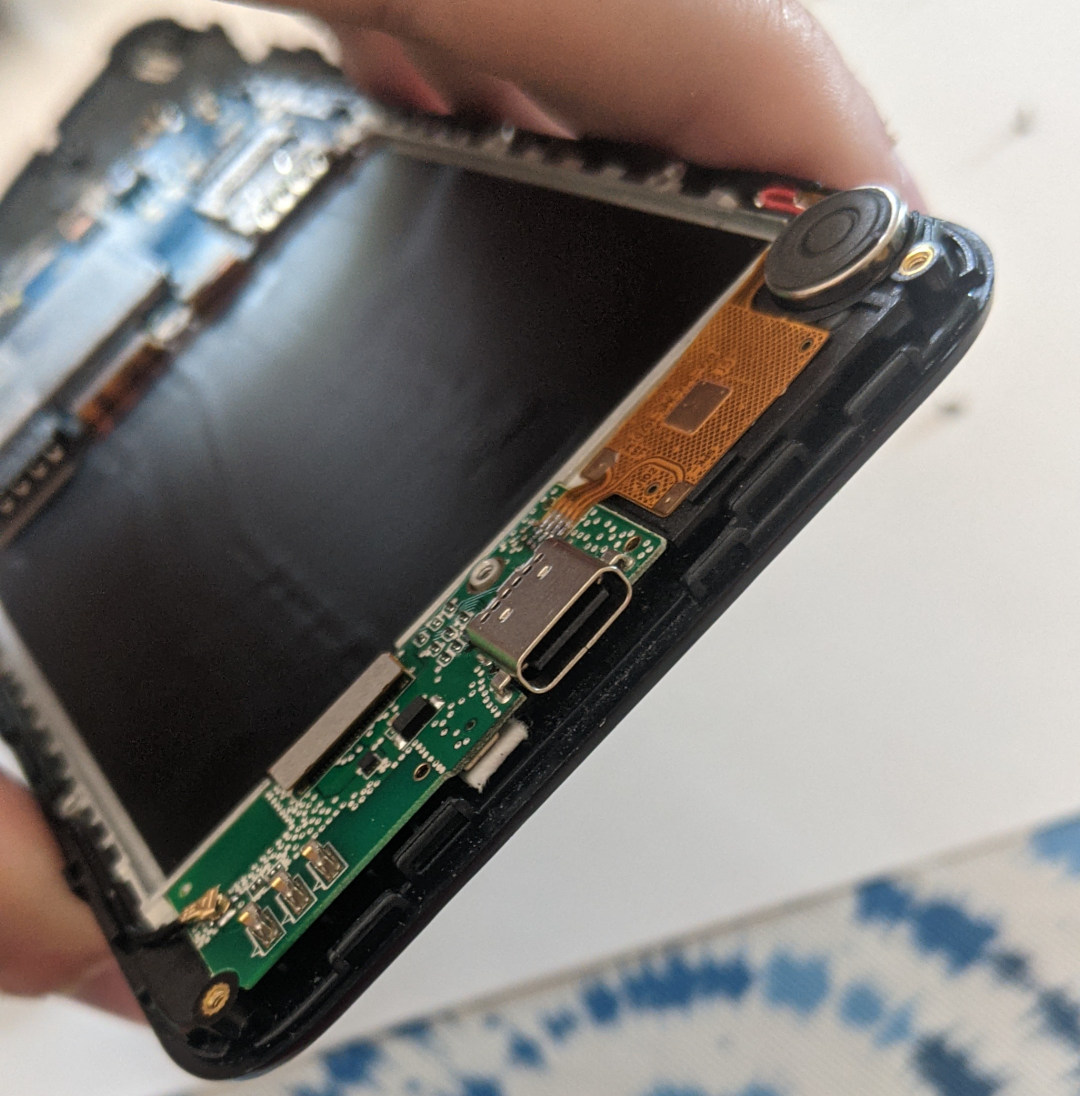
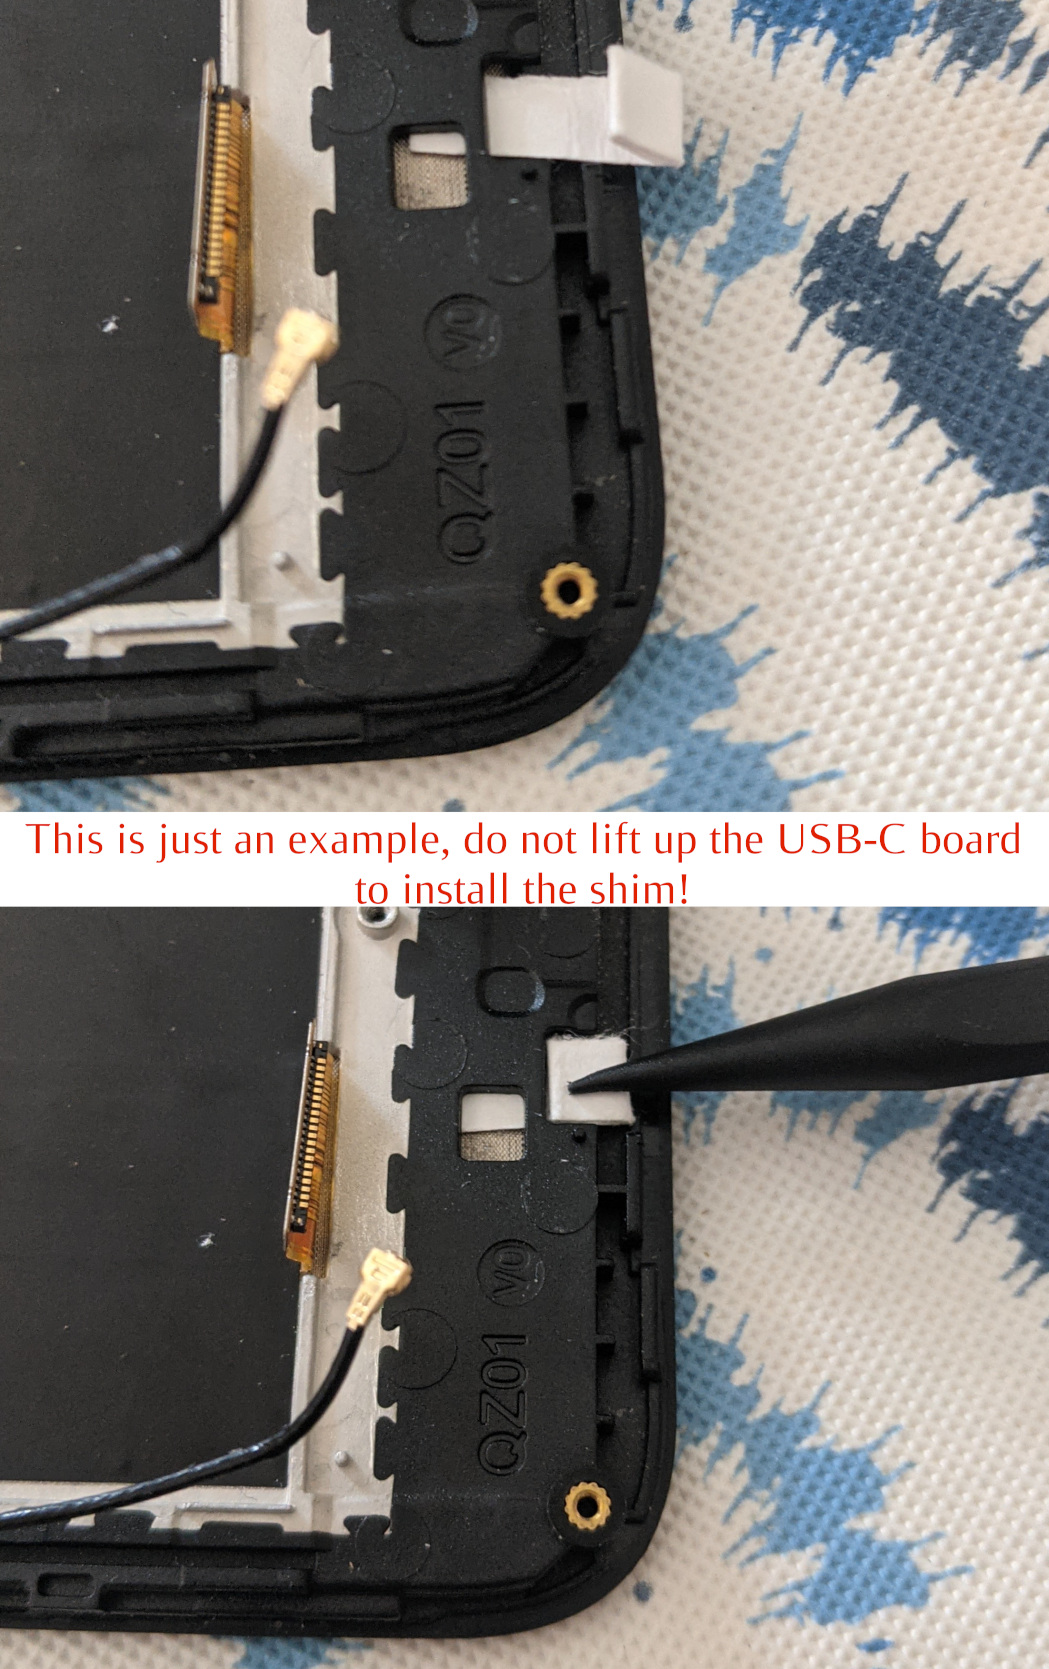
Slide it in between U101 and the screen, being careful not to lift up the USB-C Side Board. | Slide it in, tail-first between U101 and the screen assembly, being careful not to lift up the USB-C Side Board. | ||
(If you lift up the USB-C Side Board, you might mess up the connection between the PCB and PCF, which may [[PinePhone_Hardware_Issues#Bottom_Speaker break the speaker/rumble]], and will require a soldering iron to fix) | [[File:PinePhone-U101-shim-installed.jpg|400px]] | ||
(If you lift up the USB-C Side Board, you might mess up the connection between the PCB and PCF, which may [[PinePhone_Hardware_Issues#Bottom_Speaker|break the speaker/rumble]], and will require a soldering iron to fix) | |||
[[File:PinePhone-U101-shim-example.jpg|300px]] | |||
Reassemble the PinePhone | Reassemble the PinePhone | ||
Revision as of 20:33, 2 July 2022
User:Earboxer/Deframe_PinePhone First, remove the frame
Fold a small strip of cardstock three times over, leaving a tail
Slide it in, tail-first between U101 and the screen assembly, being careful not to lift up the USB-C Side Board.
(If you lift up the USB-C Side Board, you might mess up the connection between the PCB and PCF, which may break the speaker/rumble, and will require a soldering iron to fix)
Reassemble the PinePhone


